
Everyone loves a good rack of ribs, right? They’re a go-to for backyard parties and cookouts. This article is all about making some seriously tasty pork spare ribs that people will rave about. We’ll cover picking the best ribs, making your own spice rub, cooking them low and slow so they’re super tender, and how to finish them off with a great BBQ sauce. Whether you’re a beginner or have been grilling for years, these bbq recipes ribs pork spare will help you make a dish that’s sure to be a hit.
Key Takeaways
- Choosing between baby back and St. Louis style spare ribs depends on size and fat content, with St. Louis ribs needing a bit more cooking time.
- A homemade rib rub with spices like paprika, garlic powder, and cumin, balanced with salt and brown sugar, adds a lot of flavor.
- Slow-baking ribs in the oven, wrapped tightly in foil, is a great way to get them tender before the final charring stage.
- Homemade or store-bought BBQ sauce can be used to coat the ribs, aiming for a balance of sweet, tangy, and smoky tastes.
- Finishing the ribs on the grill or under the broiler gives them a nice caramelized crust and brings out the sauce’s flavor.
Selecting The Perfect Pork Spare Ribs
Understanding Rib Cuts: Baby Back vs. St. Louis Style Spare Ribs
When you’re heading to the butcher or the grocery store for ribs, you’ll likely run into a couple of main types: baby back ribs and St. Louis style spare ribs. They both come from the pig, but they’re from different parts and have different characteristics. Baby backs are from the upper rib cage, near the spine. They’re generally smaller, leaner, and have a more curved shape. St. Louis style spare ribs, on the other hand, come from the lower, fattier part of the rib cage. They’re typically larger, flatter, and have more marbling, which can mean more flavor and tenderness if cooked right. For BBQ, St. Louis style are often preferred because of that extra fat and meat, but baby backs are a solid choice too, especially if you want something a bit quicker to cook.
Choosing Ribs for Tenderness and Flavor
Picking the best ribs at the store is more than just grabbing the first package you see. You want to look for a few things that signal good quality. First, check out the marbling – those little white flecks of fat within the meat. More marbling usually means a more tender and flavorful rib. The meat itself should look a nice pinkish-red color, not dull or grayish. Avoid racks that look overly dry or have a lot of dark spots. Sometimes, you’ll see a thin, papery membrane on the bone side of the ribs. It’s a good idea to remove this before cooking, as it can get tough and chewy. If you can, try to find ribs that are evenly thick across the rack. This helps them cook more uniformly, so you don’t end up with some parts overcooked and others still tough.
Here’s a quick rundown:
- Marbling: Look for those little white fat streaks. They’re your friend for tenderness.
- Color: A healthy pinkish-red is what you want. Avoid anything that looks dull or bruised.
- Membrane: Check the bone side. If there’s a thin, papery layer, plan to remove it.
- Thickness: Aim for ribs that are pretty uniform in thickness from one end to the other.
When you’re shopping for ribs, don’t be afraid to ask the butcher for their recommendation. They often know which cuts are best that day and can even trim them up for you if needed. It’s a small step that can make a big difference in your final dish.
Crafting Your Signature Rib Rub
Alright, let’s talk about the magic that happens before the ribs hit the heat. A good rub isn’t just about throwing spices in a bowl; it’s about building layers of flavor that will sink into that pork and make every bite sing. Think of it as the foundation for your BBQ masterpiece.
Essential Spices for a Classic Rub
A classic rub usually hits a few key notes: savory, a little sweet, and maybe a touch of heat. You don’t need a million ingredients to make something delicious. Here are some workhorses you’ll find in many great rubs:
- Smoked Paprika: This is where you get that beautiful smoky depth without actually smoking the ribs (yet!). It also gives a lovely reddish hue.
- Garlic Powder: A must-have for that savory punch. It’s more mellow than fresh garlic and distributes evenly.
- Onion Powder: Similar to garlic powder, it adds a foundational savory flavor.
- Black Pepper: Freshly ground is best, offering a bit of bite.
- Kosher Salt: It’s coarser than table salt, so it adheres better and provides pockets of flavor.
Customizing Your Dry Rub Blend
While the classics are great, the real fun comes when you start tweaking. Want to add a little something extra? Consider these additions:
- Mustard Powder: Adds a subtle tang that cuts through the richness of the pork.
- Cumin: Brings an earthy, warm flavor that pairs wonderfully with pork.
- Chili Powder: For a bit more warmth and complexity. Use a mild one if you’re not looking for heat.
- Cayenne Pepper or Red Pepper Flakes: If you like a kick, these are your go-to. Start small, you can always add more.
- Brown Sugar: This is a big one for caramelization and sweetness. We’ll get to that more in a sec.
Here’s a simple, solid starting point you can build from:
| Ingredient | Amount (for 2-3 lbs ribs) | Notes |
|---|---|---|
| Brown Sugar | 2 Tbsp | Packed |
| Kosher Salt | 2 tsp | |
| Smoked Paprika | 1.5 tsp | |
| Garlic Powder | 1 tsp | |
| Mustard Powder | 1 tsp | |
| Ground Cumin | 1 tsp | |
| Black Pepper | 1 tsp | Freshly ground |
| Red Pepper Flakes | 0.5 tsp (optional) | For a little heat |
The Role of Brown Sugar and Salt
These two are arguably the most important players in your rub. The salt works to draw out moisture, which then mixes with the salt and other spices, creating a sort of brine that gets reabsorbed into the meat, making it more tender and flavorful. The brown sugar, when it hits the heat, caramelizes beautifully. This not only adds a lovely sweetness but also helps create that irresistible sticky, slightly charred exterior on your finished ribs. It’s a simple combination, but it works wonders.
When you’re mixing up your rub, don’t be afraid to taste a tiny bit. It should be flavorful on its own. Remember, this is going onto a whole rack of ribs, so you want a good amount of seasoning. Make sure to get it all over, including the sides and ends. Some folks like to rub it in, others just sprinkle. Either way works, but a good coating is key.
The Art of Slow-Baking Ribs
Slow-baking is where the magic really happens for tender, flavorful spare ribs, especially if you’re not firing up a smoker. It’s a method that takes a little patience but pays off big time. You’re basically letting the oven do the heavy lifting, coaxing out all that deliciousness from the meat.
Preparing Ribs for the Oven
First things first, you’ll want to get your ribs ready. This usually involves a good rub, and maybe removing that tough membrane on the bone side. It’s that thin, papery layer that can get chewy if you leave it on. You can usually peel it off with a butter knife and some paper towels. Then, give those ribs a good coating of your favorite dry rub. Don’t be shy with it!
- Remove the membrane: Use a butter knife to lift an edge, then grab with paper towels and pull it off.
- Apply the rub: Cover both sides generously with your spice blend.
- Wrap them up: Tightly wrap each rack in heavy-duty aluminum foil. This traps the moisture and helps them cook evenly.
Oven Temperature and Cooking Times
For that perfect tender texture, low and slow is the way to go. A temperature around 300°F (150°C) is usually spot on. The cooking time will depend on the type and thickness of your ribs.
| Rib Type | Approximate Oven Time | Notes |
|---|---|---|
| Baby Back Ribs | 1.5 – 2 hours | Tend to be smaller and cook faster. |
| St. Louis Style Ribs | 2.5 – 3 hours | Larger and meatier, need more time. |
The goal is tender meat that’s still attached to the bone, not falling off completely.
Achieving Tender, Fall-Off-The-Bone Texture
After the initial slow bake, the ribs should be quite tender. You’ll know they’re ready when the meat has shrunk back from the ends of the bones and a gentle poke yields easily. If you’re aiming for that truly "fall-off-the-bone" texture, you might need to extend the oven time a bit, but be careful not to overcook them into mush. The resting period after baking is also key; it lets the juices redistribute, making the ribs more moist and easier to handle for the next step.
Resting the ribs after their initial bake is a small step that makes a big difference in the final texture and juiciness. Don’t skip it!
Once they’ve rested, you can either proceed to the saucing and finishing stage or chill them for later. This make-ahead capability is one of the best parts of this method.
Mastering the BBQ Sauce
Homemade vs. Store-Bought BBQ Sauces
Alright, let’s talk sauce. You’ve got two main paths here: the convenience of a good store-bought sauce or the satisfaction of making your own. Honestly, for a classic BBQ spare rib, a good quality bottled sauce can totally work. Look for one that’s got a nice balance of sweet and tangy, maybe with a hint of smoke already built in. Brands that use brown sugar or honey as a base are usually a safe bet. But if you’ve got a little extra time and want to really make these ribs sing, whipping up your own sauce is where it’s at. It lets you control every flavor note, from the sweetness to the spice level.
Balancing Sweet, Tangy, and Smoky Flavors
Getting the sauce right is all about hitting those key flavor points. You want that sweetness, usually from sugar, molasses, or honey, to balance out the tanginess from things like vinegar or Worcestershire sauce. Then there’s the smoke. You can get this from smoked paprika, liquid smoke (use sparingly!), or by actually smoking the sauce itself, though that’s a whole other level. A good sauce should have a little something from each category. Too sweet and it’s cloying, too tangy and it’s sharp, too smoky and it can overpower everything else. It’s a bit of an art, really.
Here’s a basic idea of how you might build those flavors:
- Sweet: Brown sugar, molasses, honey, ketchup
- Tangy: Apple cider vinegar, white vinegar, Worcestershire sauce, mustard
- Smoky: Smoked paprika, chipotle powder, liquid smoke
- Spicy (Optional): Cayenne pepper, chili powder, hot sauce
Incorporating Classic Ingredients
When you’re making your own sauce, a few ingredients tend to show up again and again for a reason. Ketchup is often the base, providing a tomatoey foundation and some sweetness. Vinegar, usually apple cider vinegar, brings that essential tang. Molasses adds a deep, rich sweetness and a darker color. Mustard, often Dijon, adds a bit of bite and complexity. And don’t forget Worcestershire sauce – it’s like a secret weapon for adding umami and depth. Spices like garlic powder, onion powder, and paprika are also pretty standard. You can play around with these, but starting with these classics is a solid move.
Making your own BBQ sauce might seem like a lot of work, but it’s surprisingly straightforward. Most recipes involve simmering ingredients together for a short time to let the flavors meld. The result is a sauce that tastes so much fresher and more vibrant than anything you’ll find in a bottle. Plus, you can tweak it to be exactly how you like it – more spice, less sweet, whatever floats your boat.
Here’s a simple starting point for a homemade sauce:
- 1 cup ketchup
- 1/4 cup apple cider vinegar
- 2 tablespoons molasses
- 1 tablespoon Worcestershire sauce
- 1 tablespoon Dijon mustard
- 1 teaspoon garlic powder
- 1 teaspoon onion powder
- 1/2 teaspoon smoked paprika
- Pinch of cayenne pepper (optional)
Just combine everything in a saucepan, bring it to a simmer over medium heat, then reduce the heat and let it bubble gently for about 10-15 minutes until it thickens up a bit. Give it a taste and adjust seasonings as needed. Easy peasy.
Finishing Touches: Grilling or Broiling
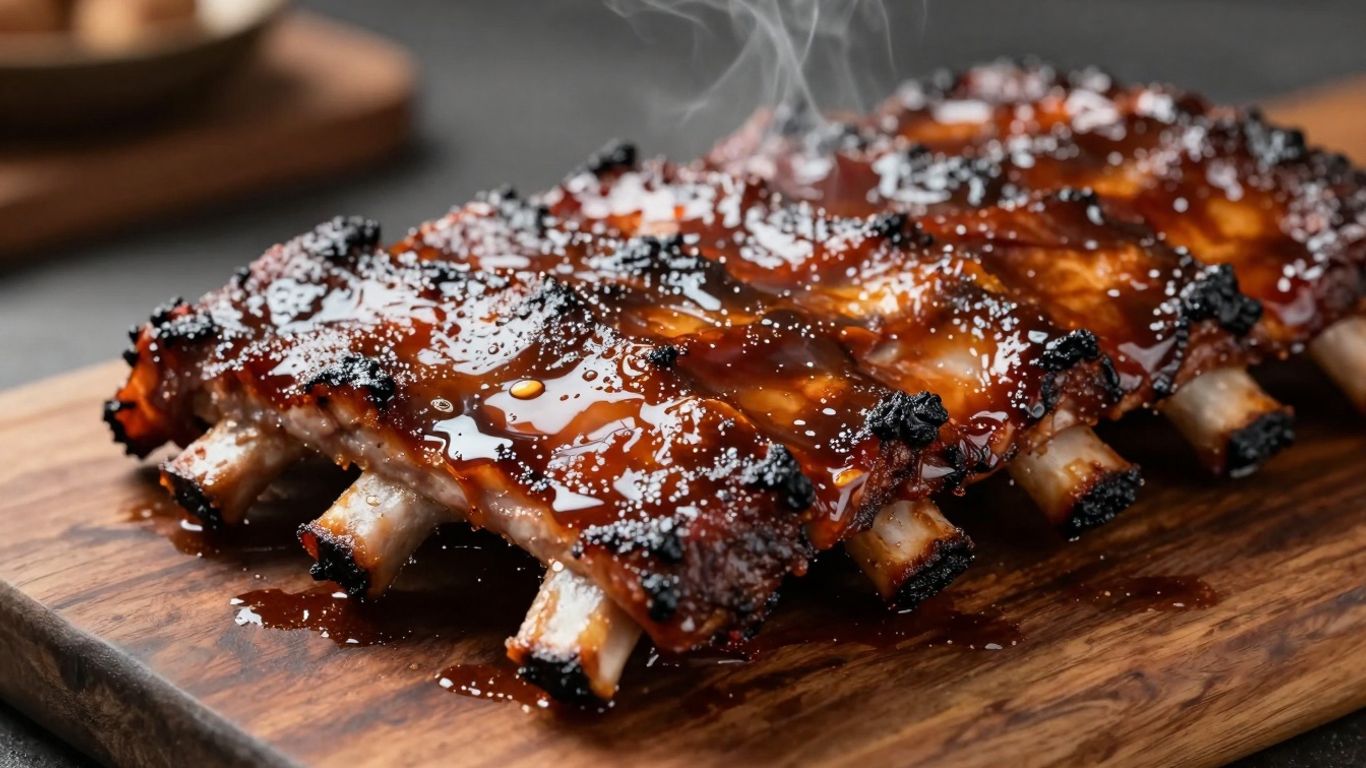
Alright, so your ribs have come out of the oven, all tender and smelling amazing. Now it’s time for that final bit of magic that really makes them "BBQ" ribs. We’re talking about getting a little char, a nice caramelization, and that final layer of flavor. You’ve got two main ways to go here: the grill or the broiler. Both work great, just in slightly different ways.
Grilling for a Perfect Char
This is probably the most classic way to finish ribs. You’ve already done the slow cooking, so the ribs are cooked through. Now, we’re just using the grill to add that smoky char and heat them up.
Here’s a quick rundown:
- Prep the Grill: Get your grill going over medium-high heat. You want it hot enough to get a nice sear, but not so hot that things burn instantly.
- Sauce ‘Em Up: Cut your ribs into serving sizes – maybe 1-2 bones each, or a few together. Brush them generously with your favorite BBQ sauce. Don’t be shy here!
- Hit the Heat: Place the sauced ribs directly on the hot grill grates. Let them cook for about 5-7 minutes per side. You’re just looking for that beautiful char and to heat them through. Keep an eye on them and turn them occasionally.
- Taste Test: Grab one and give it a try. If it’s heated through and has that nice smoky char, you’re golden.
Broiling for Caramelized Goodness
No grill? No problem! Your oven’s broiler can do a fantastic job of caramelizing that sauce and giving you those delicious dark spots. It’s a bit faster than grilling, so you need to pay close attention.
- Set Up: Position your oven rack about 6-8 inches from the broiler element. You want it close enough to get color, but not so close they’ll burn immediately.
- Arrange: Place your sauced, cut rib portions on a broiler pan or a sturdy baking sheet. This helps catch any drips.
- Watch Closely: Put the pan under the broiler. This is where you really need to be present. Ribs can go from perfectly caramelized to burnt in a flash. Cook for a few minutes, then use tongs to flip them. Continue cooking and flipping until they have those nice dark, caramelized spots all over and are heated through. This usually takes about 6-10 minutes total.
Saucing and Charring Techniques
No matter which method you choose, the sauce is key here. Apply it generously right before hitting the heat. The high heat will help it bubble and caramelize, creating that sticky, sweet, and smoky crust we all love. If you’re grilling, you can even brush on a little extra sauce in the last minute or two of cooking. For broiling, make sure the sauce is applied evenly before they go under the heat. The goal is to get those little crispy, charred bits without burning the whole rack.
The final charring step is all about adding that signature BBQ flavor and texture. It’s the difference between a good rib and a great rib. Don’t skip it!
Remember, at this stage, the ribs are already cooked. You’re just finishing them off. This makes the process pretty stress-free, especially if you’re serving a crowd. You can focus on getting that perfect finish without worrying about undercooked meat.
Make-Ahead Strategies for Ribs
Planning a big get-together and want to serve amazing BBQ spare ribs without all the last-minute stress? You’re in luck! Ribs are actually fantastic candidates for making ahead. This means you can get most of the cooking done when you have the time, and then just do a quick finish right before serving. It really takes the pressure off, and nobody will ever know you prepped them.
Baking Ahead for Convenience
This is where the magic happens. After you’ve seasoned your ribs and slow-baked them until they’re tender (we’re talking about that point where the meat is cooked through but still clinging nicely to the bone), you have a choice. You can either proceed to the finishing steps, or you can cool them down and store them. To bake them ahead, let them rest for about 15 minutes after they come out of the oven. This helps the juices settle. Then, you can either move them straight to the fridge or wrap them up tightly in foil and place them on a baking sheet before refrigerating. They’ll keep well this way for a couple of days.
Refrigerating and Storing Cooked Ribs
Once your ribs are baked and have rested, they’re pretty much ready for their nap in the fridge. Keep them wrapped tightly in foil, perhaps still on the baking sheet they cooked on. This helps prevent them from drying out. They can hang out in the refrigerator for up to two days. Honestly, they’re already cooked, so you could even sneak a bite if you’re feeling peckish, though saving them for the main event is probably a good idea. Just remember to take them out about 15-30 minutes before you plan to reheat them so they aren’t ice cold.
Reheating and Finishing Ribs
This is the fun part where you get to bring them back to life and add that final touch. After your ribs have come up to room temperature a bit, it’s time to sauce them. Brush your chosen BBQ sauce all over the individual rib portions. Then, you have two main options for finishing:
- Grilling: Get your grill to a medium-high heat. Place the sauced ribs directly over the heat for just a couple of minutes per side. You’re not really cooking them here, just warming them through and getting a nice, slightly charred exterior. It’s quick and adds that authentic BBQ flavor.
- Broiling: If grilling isn’t an option, your oven broiler can do the trick. Position an oven rack about 6-8 inches from the heat source. Place the sauced ribs on a broiler pan or a sturdy baking sheet. Keep a close eye on them, as they can go from perfectly caramelized to burnt in a flash. Flip them occasionally until they have those desirable dark spots and are heated through.
The beauty of this make-ahead method is that the primary, longer cooking process is done in the oven. This means you’re not juggling raw meat and cooking times when your guests arrive. You’ve already achieved that tender texture, and the final grilling or broiling is just about adding that perfect finishing glaze and char. It makes hosting so much more relaxed.
This approach is also great if you’re planning on serving a lot of people. You can bake multiple racks at once, and then just do the quick finishing touches as needed. It’s a smart way to serve up tender beef back ribs without breaking a sweat.
Troubleshooting Common Rib-Cooking Issues
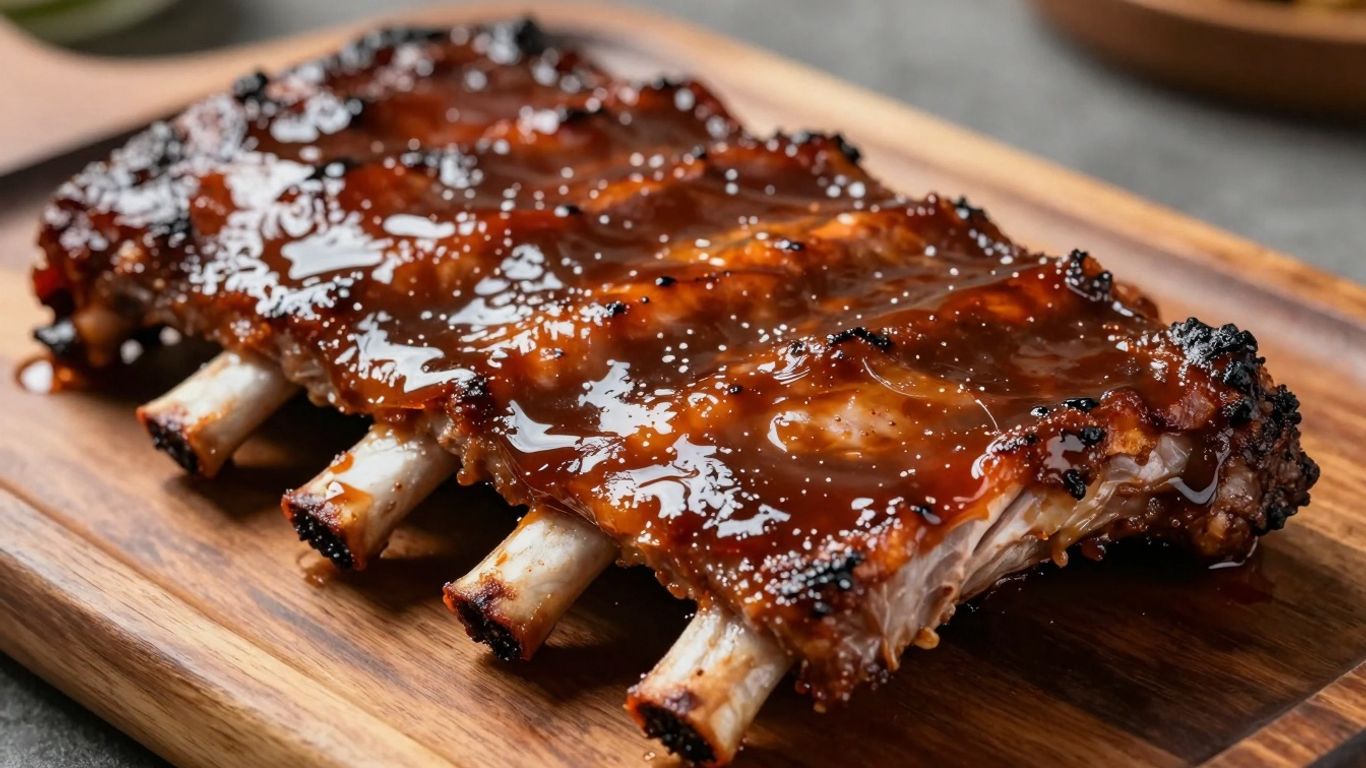
Even with the best intentions, sometimes ribs don’t turn out quite how we pictured. It happens to everyone, and usually, there’s a fix or a reason why. Let’s talk about some common problems and how to sort them out.
Addressing Tough or Dry Ribs
This is probably the most common complaint. Tough ribs often mean they just didn’t cook long enough, or maybe the heat was too high for too long, drying them out. If your ribs feel like shoe leather, don’t despair. Sometimes, they just need a little more time. If they’re already cooked but dry, you can try a few things.
- Re-moisten: Wrap them tightly in foil with a splash of liquid – water, broth, apple juice, or even some extra BBQ sauce. Pop them back into a low oven (around 250°F or 120°C) for another 30-60 minutes. This steams them and adds moisture back.
- Sauce is Your Friend: A good slathering of BBQ sauce can help mask dryness, especially when you’re finishing them on the grill or under the broiler. The sugars in the sauce caramelize and create a nice crust.
- Check Your Cooking Time: For spare ribs, you’re generally looking at 2.5 to 3 hours of slow baking at around 300°F (150°C) before you even think about finishing them. Baby backs are quicker, but still need a good chunk of time.
Ensuring Even Cooking and Tenderness
Getting ribs perfectly tender all the way through can be tricky. It’s all about managing heat and time. If one end is done before the other, or if the meat is tough in spots, here’s what might be going on:
- The Membrane: Did you remember to remove the thin, papery membrane on the bone side? If not, it can make the ribs tough and prevent seasonings from getting in. It’s usually easy to peel off after you lift an edge with a knife.
- Oven Hot Spots: Ovens aren’t always perfectly even. Try rotating your baking sheet halfway through the slow-bake. If you’re using a convection setting, be aware it can cook faster, so keep an eye on them.
- Rib Cut Matters: St. Louis style spare ribs are thicker and have more fat than baby backs. They naturally need a longer cooking time to break down that connective tissue and become tender. Don’t treat them the same as baby backs.
Sometimes, the best way to learn is by doing. If your ribs turn out a little tough or dry one time, take note of what you did and try to adjust next time. It’s a learning process, and even "imperfect" ribs are usually still pretty tasty!
Here’s a quick guide to typical cooking times for slow-baking:
| Rib Type | Oven Temp (°F) | Approx. Cook Time (Hours) |
|---|---|---|
| Baby Back Ribs | 300°F | 1.5 – 2 |
| St. Louis / Spare | 300°F | 2.5 – 3 |
Serving Your BBQ Spare Ribs
Alright, so you’ve gone through all the work, and now you’ve got these amazing, tender spare ribs. The final step is getting them ready for your hungry guests. It’s not just about slapping them on a plate; there’s a little bit of finesse involved to make sure everyone enjoys them.
Cutting and Plating Ribs
First things first, you need to cut these beauties. Don’t try to serve a whole slab; it’s just not practical. The best way is to cut them into individual ribs or small portions of two to four ribs. This makes them easy to grab and eat. Use a sharp knife – a good chef’s knife or even a serrated bread knife can work wonders here. You want clean cuts so the meat doesn’t get all mangled. Place them on a platter, maybe fanned out a bit, so people can see what they’re getting. Presentation matters, even with something as down-to-earth as ribs.
Classic Side Dish Pairings
Ribs are hearty, so they need sides that can stand up to them. Think classic BBQ fare. You can’t go wrong with:
- Creamy coleslaw: The crunch and tang cut through the richness of the ribs.
- Potato salad: Whether it’s a mayo-based or a vinaigrette style, it’s a solid choice.
- Cornbread: A little sweet, a little crumbly, perfect for soaking up any extra sauce.
- Baked beans: A smoky, sweet side that just screams BBQ.
- Macaroni and cheese: Always a crowd-pleaser, especially for the kids.
The Importance of Plenty of Napkins
This is non-negotiable. Ribs are messy. It’s part of the fun! Make sure you have a generous stack of napkins, paper towels, or even those moist towelettes that some places offer. People will be grateful. Seriously, don’t skimp on the napkins. It’s better to have too many than not enough. You want your guests to be comfortable and able to enjoy the experience without worrying about getting sauce all over themselves.
Ribs are meant to be enjoyed with your hands. Embrace the mess; it’s a sign of a good time and delicious food. Providing ample napkins is a simple act of hospitality that makes the whole meal more enjoyable for everyone.
Exploring Flavor Variations
Once you’ve got the basics down for cooking ribs, the real fun begins: playing with flavors! It’s like having a blank canvas, and your rub and sauce are your paints. Don’t be afraid to get creative; that’s how you find your own signature taste.
Experimenting with Different Rubs
The dry rub is where you build the first layer of flavor. While a classic blend of paprika, garlic powder, onion powder, salt, and pepper is fantastic, there are tons of ways to switch it up. Think about what kind of taste you’re going for.
- Spicy Kick: Add cayenne pepper, red pepper flakes, or even a pinch of ghost pepper powder if you’re brave. A little goes a long way!
- Sweet & Savory: Boost the brown sugar or add a touch of maple sugar. Consider adding smoked paprika for a deeper, smoky note without extra heat.
- Herbal Notes: Dried herbs like thyme, rosemary, or oregano can add a nice complexity, especially if you’re going for a more rustic flavor.
- Umami Boost: A bit of mushroom powder or even some finely ground coffee beans can add a really interesting depth.
Here’s a simple base rub you can build on:
| Ingredient | Amount (for ~2 lbs ribs) | Notes |
|---|---|---|
| Brown Sugar | 2 tbsp | Adds sweetness and helps caramelize |
| Chili Powder | 1 tbsp | For color and mild flavor |
| Salt | 2 tsp | Balances sweetness, draws out moisture |
| Black Pepper | 1 tsp | Classic spice |
| Garlic Powder | 1/2 tsp | Aromatic base |
| Onion Powder | 1/2 tsp | Another aromatic base |
Creative BBQ Sauce Combinations
Your BBQ sauce is the finishing glaze, and it can totally change the character of the ribs. You can go the traditional route or get wild with it.
- Fruity Twist: Blend in some fruit preserves like apricot, peach, or even raspberry. This adds a unique sweetness and tang.
- Vinegar-Forward: If you like a sharper taste, increase the amount of apple cider vinegar or try adding a splash of white vinegar.
- Smoky Depth: Add a bit of liquid smoke (use sparingly!) or incorporate chipotle peppers in adobo sauce for a smoky heat.
- Asian Influence: Try a sauce with soy sauce, ginger, garlic, and a touch of honey or hoisin sauce.
Remember, the sauce doesn’t just sit on top; it interacts with the rub and the meat as it cooks, creating a delicious crust.
Adding a Touch of Spice or Smoke
Beyond the rub and sauce, you can infuse even more flavor during the cooking process. If you’re grilling, consider adding wood chips like hickory, mesquite, or applewood to your coals for that authentic smoky flavor. If you’re baking, you can add a splash of liquid smoke to your sauce or even wrap the ribs in foil with a bit of broth or beer towards the end of cooking to steam them and keep them moist. Don’t be afraid to experiment; the best BBQ often comes from happy accidents and personal tweaks!
Enjoy Your Ribs!
So there you have it – a simple way to get those tender, saucy ribs everyone loves, without all the fuss. Whether you’re a seasoned grill master or just starting out, this method makes it easy to impress your friends and family. They’re perfect for game days, cookouts, or just a really good Tuesday night dinner. Don’t be afraid to play around with different rubs and sauces to make them your own. Happy cooking!
Frequently Asked Questions
What’s the difference between baby back ribs and spare ribs?
Think of baby back ribs as the leaner, more tender option that cooks a bit quicker. Spare ribs, especially the St. Louis style, are wider, meatier, and have a bit more fat, which adds great flavor but means they need a little longer to get perfectly tender.
How do I make sure my ribs are super tender?
The secret is slow cooking! Baking them low and slow in the oven, wrapped tightly in foil, helps break down the tough connective tissues. Don’t rush this part; the longer they cook gently, the more tender they’ll become.
Can I skip the dry rub and just use BBQ sauce?
You can, but a dry rub adds a whole other layer of flavor before the sauce even comes into play. If you’re short on time, a simple mix of salt, pepper, and garlic powder works, or even a store-bought steak seasoning. But a good rub really makes a difference!
How long should I bake the ribs?
For baby back ribs, aim for about 1.5 to 2 hours. St. Louis style or other spare ribs will need a bit more time, around 2.5 to 3 hours. You want them tender, but not so soft they fall apart when you handle them.
What’s the best way to finish the ribs after baking?
You have two great options! Grilling gives them a fantastic smoky char, while broiling in the oven creates a lovely caramelized crust. Both methods involve brushing them with your favorite BBQ sauce and cooking them for just a few minutes per side until they’re heated through and nicely browned.
Can I make these ribs ahead of time?
Absolutely! That’s one of the best things about this recipe. You can bake them, let them cool, and store them in the fridge for up to two days. Then, you just need to reheat and finish them on the grill or under the broiler right before serving.
My ribs came out tough. What did I do wrong?
Tough ribs usually mean they didn’t cook long enough or low enough. Make sure you’re baking them at a low temperature (around 300°F) for the recommended time. Also, removing the tough membrane from the bone side before cooking can help a lot with tenderness.
What should I serve with my BBQ spare ribs?
Classic pairings are always a hit! Think creamy coleslaw, fluffy cornbread, tangy potato salad, or some baked beans. And, of course, don’t forget plenty of napkins – these ribs are deliciously messy!