
So, you want to get that perfect smoky flavor and tender meat every time you fire up the smoker? It’s not as complicated as it might seem. Lots of folks think there’s some secret handshake to getting consistent results, but honestly, it’s more about understanding a few key things and practicing them. Whether you’re using a fancy offset or a simpler electric model, these bbq smoker tips and tricks will help you move beyond beginner luck and start cooking like a seasoned pro. Let’s break down what really makes a difference.
Key Takeaways
- Choosing the right cut of meat, like brisket or pork shoulder, with good marbling is the first step to juicy, flavorful smoked food.
- Wood selection is vital; hardwoods like hickory or applewood provide authentic smoky flavor, and experimenting with combinations can create unique tastes.
- Proper meat prep, including trimming fat and applying rubs or marinades, helps flavor penetrate and keeps the meat moist during the long cooking process.
- Consistent temperature control, typically low and slow (225-250°F), is achieved by managing airflow and using thermometers to monitor both the smoker and the meat.
- Knowing when your meat is done is about hitting the right internal temperature, usually between 195-205°F for tender cuts, and always letting it rest afterward.
Selecting The Right Cuts For Smoking
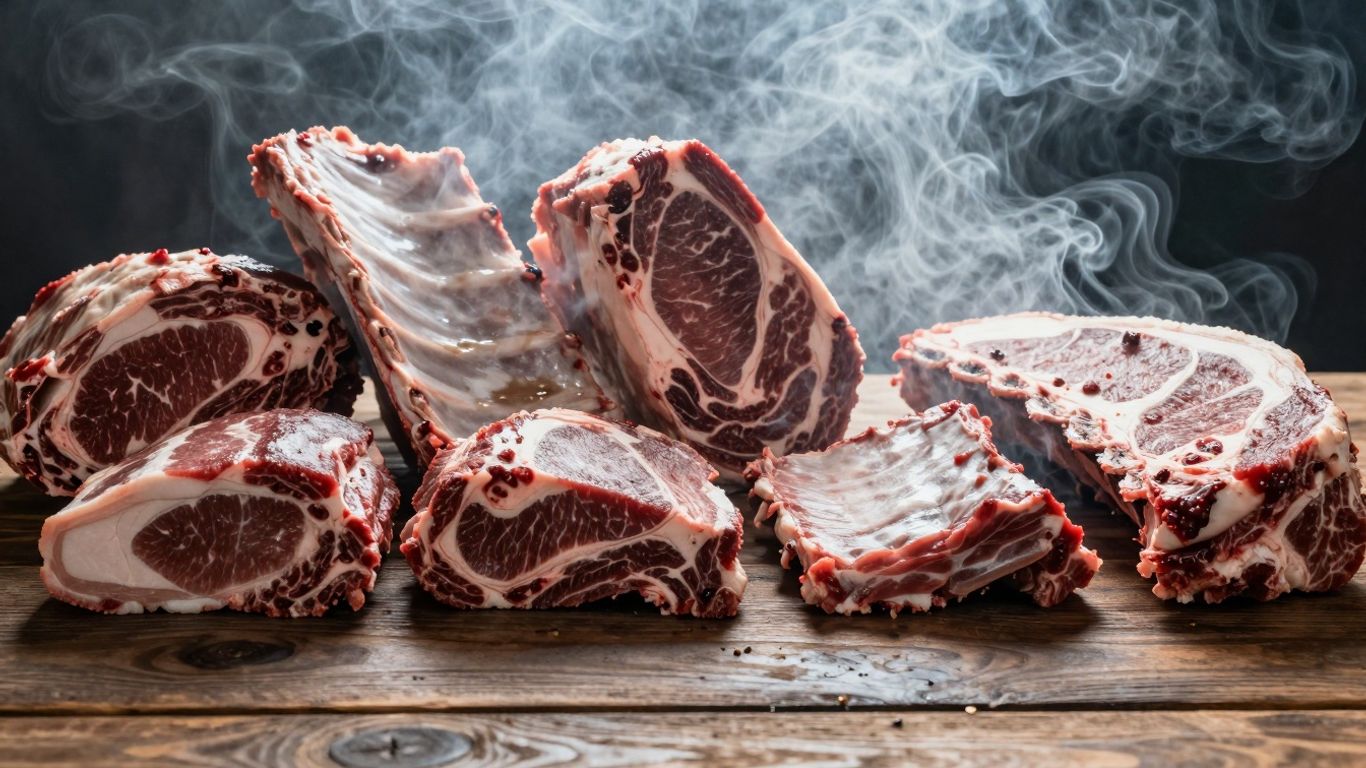
When you’re aiming for that perfect smoky flavor, the cut of meat you pick is a pretty big deal. It’s not just about throwing any old piece of meat on the smoker; some cuts just handle the low-and-slow cooking process way better than others. Think of it like this: you wouldn’t try to bake a delicate cake in a super hot oven for hours, right? Same idea here. We want cuts that can take their time, break down, and become incredibly tender without drying out.
Choosing Quality Meat For Smoking
First things first, start with good meat. It sounds obvious, but it makes a difference. Look for meat that has a nice, deep red color and doesn’t look dried out or pale. For beef, you’ll want to check out cuts like brisket or chuck roast. Pork shoulder, often called Boston butt, is another fantastic choice, especially if you’re planning on making pulled pork. And don’t forget ribs! Both pork ribs (spare or baby back) and beef ribs are practically made for smoking. The key is to find something with a good amount of fat. That fat is your friend; it melts as it cooks, keeping the meat moist and adding tons of flavor.
Best Cuts For Low And Slow Cooking
So, what makes a cut ideal for "low and slow"? It’s usually the tougher cuts that have a lot of connective tissue and fat. These cuts, like a beef brisket flat or a pork shoulder, benefit from the long cooking times. The slow heat breaks down that tough tissue and renders the fat, turning what could be a chewy piece of meat into something incredibly tender and juicy. Trying to smoke a lean cut, like a chicken breast or a tenderloin, without careful attention will likely result in a dry, disappointing meal. You’re looking for those cuts that have been worked hard by the animal – they have more flavor and the right structure to withstand hours of gentle heat.
Here are some top picks:
- Beef Brisket: A classic for a reason. The point and flat sections both work, but the point has more fat and is often more forgiving.
- Pork Shoulder (Boston Butt): This is a go-to for pulled pork. Its high fat content and marbling make it super forgiving.
- Pork Ribs (Spare Ribs & Baby Backs): Both are great, though spare ribs tend to have a bit more meat and fat.
- Beef Ribs: Short ribs or plate ribs are fantastic, offering a rich, beefy flavor.
Understanding Marbling For Moisture
Marbling is basically those little white flecks of fat you see running through the muscle of the meat. This intramuscular fat is what keeps your smoked meat moist and flavorful during those long cooking hours. When the meat cooks slowly, this fat melts, basting the meat from the inside out. The more marbling a cut has, the more moisture and richness it’s likely to retain. When you’re at the butcher counter, take a good look at the meat. If you see those fine streaks of white fat woven throughout the red muscle, you’ve found a winner. It’s the secret weapon for achieving that melt-in-your-mouth texture that everyone loves in smoked meats.
Mastering The Art Of Wood Selection
Choosing the right wood is a big deal when you’re trying to get that perfect smoky flavor. It’s not just about throwing any old log on the fire; different woods bring different tastes to your meat. Think of it like picking spices for a recipe – you wouldn’t use cinnamon on a steak, right?
Hardwood For Authentic Smoky Flavor
Hardwoods are the classic choice for a reason. They’ve been used for ages to give smoked foods that deep, rich flavor we all love. Woods like oak, hickory, and mesquite are popular because they burn well and give off a strong, distinct smoke. Oak is pretty versatile, good for beef or pork. Hickory is a bit stronger, often paired with pork or bacon. Mesquite is really intense, so you gotta be careful with it, usually best for quick cooks or smaller cuts.
- Oak: A medium, classic smoke flavor. Great for beef, pork, and poultry.
- Hickory: A stronger, bacon-like flavor. Excellent for pork and ribs.
- Mesquite: A very bold, earthy flavor. Best for quick cooks or beef.
- Pecan: A milder, sweeter smoke. Good for poultry and pork.
Using hardwood is key to getting that authentic smoky taste that charcoal alone can’t provide. It’s the traditional way, and for good reason.
Choosing Wood Varieties For Different Meats
Matching your wood to your meat is where things get interesting. You want the smoke to complement, not overpower, the natural flavor of the meat. For lighter meats like chicken or fish, you’ll want milder woods. Fruitwoods like apple or cherry are fantastic here. They give a subtle sweetness that doesn’t overwhelm the delicate flavors.
- Poultry & Fish: Applewood, Cherrywood, Pecan. These offer a lighter, sweeter smoke.
- Pork: Hickory, Maple, Applewood. These provide a good balance of smoke and sweetness.
- Beef & Game: Oak, Mesquite, Hickory. These stronger woods can stand up to the richer flavors of red meat.
Experimenting With Wood Combinations
Don’t be afraid to mix and match! Sometimes, combining two different woods can create a really unique flavor profile. For example, you might try a base of oak for a steady smoke and then add a few chunks of cherrywood towards the end for a touch of sweetness. It takes some trial and error, but finding your favorite wood combo is part of the fun. Keep notes on what you try and how it turns out – it’ll help you remember what worked best for different meats and occasions.
Perfecting Meat Preparation Techniques
Getting your meat ready before it hits the smoker is a big deal. It’s not just about slapping it on; there’s a bit of science and art to it that pros really nail down. Doing this right means your meat will come out tender, juicy, and packed with flavor, not dry or bland.
Trimming Excess Fat For Optimal Results
When you’re smoking, fat is your friend, but too much can be a problem. You want a good amount of fat to render down and keep the meat moist, but thick, hard chunks of fat can prevent smoke and rub from getting into the meat. Plus, they just don’t taste great when you bite into them. Pros usually trim off the thick, hard fat caps, leaving about a quarter-inch of fat behind. This allows the smoke to penetrate and the fat to melt into the meat.
- Identify hard fat: This is usually the thick, white, unyielding fat on the surface.
- Trim to about 1/4 inch: Use a sharp knife to carefully shave down the thick fat cap.
- Leave some marbling: Don’t go crazy removing all the fat; the intramuscular fat is what makes the meat tender and juicy.
Removing excess fat isn’t about making the meat lean; it’s about managing the fat so it helps, rather than hinders, the smoking process. A balanced approach leads to better flavor and texture.
Applying Flavorful Dry Rubs And Marinades
This is where you really start building flavor. A good rub or marinade does more than just add taste; it can help tenderize the meat and create that awesome crust, or ‘bark,’ that everyone loves. Pros often use dry rubs, which are mixtures of salt, pepper, sugar, and spices. They apply these rubs generously, making sure to coat all sides of the meat. Some might also use a binder, like mustard or hot sauce, to help the rub stick better. Marinades are good too, especially for leaner cuts, as they add moisture and flavor before smoking.
Here’s a basic dry rub recipe many pitmasters use:
| Ingredient | Amount (for ~3 lbs meat) |
|---|---|
| Brown Sugar | 1/4 cup |
| Paprika | 1/4 cup |
| Kosher Salt | 2 tbsp |
| Black Pepper | 1 tbsp |
| Garlic Powder | 1 tbsp |
| Onion Powder | 1 tsp |
| Cayenne Pepper | 1/2 tsp (optional) |
Allowing Meat To Rest Before Smoking
This step is often overlooked, but it’s super important. Letting the meat sit after you’ve trimmed and rubbed it, before it goes on the smoker, allows the salt in the rub to start doing its job. It begins to break down the proteins and draw out some moisture, which then gets reabsorbed, carrying the flavors deeper into the meat. This process, sometimes called ‘dry brining,’ can make a huge difference in the final taste and tenderness. Most pros let their meat rest for at least an hour, but some will even let it sit in the fridge overnight for tougher cuts like brisket. This preparation is key to achieving that perfect smoky flavor.
- Apply rub and let sit at room temperature for at least 1 hour.
- For deeper flavor, refrigerate overnight after applying the rub.
- Ensure the meat is not sitting in its own juices for too long, especially if refrigerated.
Achieving Consistent Temperature Control
Keeping your smoker at the right temperature is probably the most important thing you can do for good barbecue. It’s not always easy, especially with those offset smokers that can be a bit finicky. But once you get the hang of it, your food will turn out so much better. Think of it like this: if the temperature is all over the place, your meat is going to cook unevenly. You might get some parts that are dry and tough, while others are still a bit undercooked. That’s no fun for anyone.
The Importance Of Low And Slow Heat
Smoking is all about patience. You’re not trying to blast the meat with high heat; you’re gently coaxing it into tenderness over a long period. This low and slow approach is what breaks down the tough connective tissues in cuts like brisket and pork shoulder, turning them into that melt-in-your-mouth goodness we all love. High heat just dries everything out and makes the meat tough. So, aim for temperatures generally between 225°F and 275°F. It might seem slow, but trust me, it’s worth it for the results.
Managing Airflow For Steady Temperatures
This is where the real magic happens with an offset smoker. You control the temperature mostly by managing the air going into the firebox. Think of the vents like your smoker’s lungs. Open them up, and you give the fire more oxygen, making it burn hotter. Close them down, and you choke the fire a bit, lowering the temperature. It’s a balancing act. You want enough air to keep a steady fire, but not so much that it runs wild. The chimney vent is important too, but it’s more for letting out the exhaust. Most of your adjustments will be with the intake vents.
Here’s a basic way to think about it:
- Start: Open the intake vent all the way to get your fire going strong.
- Adjust: Once you have a good bed of coals and the temperature is climbing, start closing the intake vent little by little. You’re looking for that sweet spot.
- Monitor: Give it about 10-15 minutes after each adjustment. The temperature won’t change instantly, so be patient.
- Refine: Use the chimney vent for small tweaks if needed, but focus on the intake.
A water pan inside your smoker can also help keep temperatures steady. It acts like a buffer, absorbing some of the heat spikes and releasing moisture. It’s a simple addition that can make a big difference in keeping things consistent.
Utilizing Thermometers For Precision
Forget guessing. You absolutely need thermometers. A good thermometer that reads the ambient temperature inside your smoker, ideally near the grate where the meat sits, is non-negotiable. Many smokers come with one built-in, but they’re often not very accurate. A separate, reliable thermometer is a smart investment. Even better are wireless probe thermometers. You can stick a probe into the meat and another in the smoker, then monitor the temps from your phone or a receiver. This means you don’t have to keep opening the lid, which lets all that precious heat escape. Knowing the exact internal temperature of your meat is just as important as knowing the smoker’s temperature. It tells you when your food is actually done, not just when it looks done.
Understanding Smoke Quality And Infusion
Identifying Thin Blue Smoke
Smoke is your main flavor agent when you’re smoking meat, but not all smoke is created equal. You want to aim for what pitmasters call ‘thin blue smoke.’ This is the good stuff. It means your fire is burning clean and hot enough to vaporize the wood’s compounds, creating small, flavorful particles that get absorbed by the meat. Think of it as a gentle kiss of smoke, not a punch in the face. Thick white smoke, on the other hand, is usually a sign of a smoldering fire, lacking oxygen. This kind of smoke is acrid, bitter, and will coat your food with unpleasant flavors and a sooty residue. Black smoke is even worse, indicating a fire that’s really struggling and likely producing a lot of creosote. So, keep an eye on your smoke’s color. If it’s thick and white or black, you need to adjust your airflow, add more fuel, or clear out some ash to get that clean, blue haze going.
Adding Smoke At The Right Stages
When you add smoke to your meat isn’t just about having smoke present; it’s about when it’s present. The initial stages of smoking are when the meat is most receptive to smoke flavor. Think of it like seasoning a dish – you add salt early on to let it penetrate. The same applies to smoke. For the first few hours, especially with larger cuts like brisket or pork shoulder, you want a consistent stream of that thin blue smoke. This allows the smoke compounds to bind with the proteins and fats. As the cook progresses and the meat’s surface starts to form a bark, its ability to absorb new smoke flavor diminishes. In fact, adding too much smoke late in the cook can actually make the meat taste bitter or overly smoky. So, focus on getting that good smoke in early and then let the meat cook.
Avoiding Overpowering Smoke Flavors
It’s a common mistake for beginners to think ‘more smoke equals more flavor.’ That’s rarely the case. Over-smoking can ruin a perfectly good piece of meat, making it taste bitter and acrid. The goal is to complement the natural flavor of the meat, not to mask it. This is where understanding wood types comes in. Different woods have different flavor profiles. Hickory is strong and classic, oak is more mellow and earthy, and fruitwoods like apple or cherry offer a sweeter, milder smoke. You also need to consider the cut of meat. A delicate fish or chicken might only need a light smoke from alder or maple, while a beef brisket can handle a more robust smoke from hickory or mesquite. Balance is key. Start with less smoke than you think you need, and you can always add more if you feel it’s lacking. It’s much harder to take away smoke flavor once it’s infused into the meat.
Enhancing Moisture And Flavor During Smoking
Keeping your meat from drying out while it’s in the smoker is a big deal. Nobody wants a tough, crumbly piece of barbecue. A lot of this comes down to managing the environment inside your smoker, and there are a few tricks pros use to keep things juicy and tasty.
Using Water Pans For Humidity
Putting a pan of water in your smoker might seem simple, but it does a lot. As the water heats up, it creates steam. This steam adds moisture to the air inside the smoker. Think of it like a little sauna for your meat. This helps stop the surface from drying out too fast, which is a common problem, especially with longer cooks. It also helps keep the temperature a bit more steady because the water absorbs some of the heat and releases it slowly. You can put the pan right on the coals if you have a charcoal smoker, or just on the grate near the heat source in an offset smoker.
Adding Aromatics To The Water Pan
This is where you can really start playing with flavors. Instead of just plain water, you can add things to it. Think about what kind of meat you’re smoking. For pork, maybe some apple cider or a few sprigs of thyme. For beef, a bit of dark beer or some rosemary could work. Even just some sliced onions or garlic can add a nice background note. The steam picks up these smells and flavors and gently infuses them into the meat. It’s not a strong flavor punch, more like a subtle background note that complements the smoke.
Here are some ideas for what to add:
- Apple cider or juice
- Beer (lager or stout work well)
- Herbs like rosemary, thyme, or bay leaves
- Vegetables like onion, garlic, or jalapeños
Maintaining Juiciness Through Slow Rendering
This is less about adding something and more about letting the cooking process do its thing. When you cook meat low and slow, the tough connective tissues inside it start to break down. They turn into gelatin, which is moist and adds a great texture. At the same time, the fat within the meat also renders, or melts. This rendered fat bastes the meat from the inside out, keeping it moist and adding a ton of flavor. The key is patience; rushing this process will result in dry, tough meat. It’s this slow breakdown and melting that makes smoked brisket or pork shoulder so incredibly tender and juicy.
The environment inside the smoker is just as important as the meat itself. Managing humidity and temperature with things like water pans and understanding how fat renders are big steps toward getting that perfect, moist result every time. It’s about creating the right conditions for the meat to cook perfectly.
Knowing When Your Smoked Meat Is Done
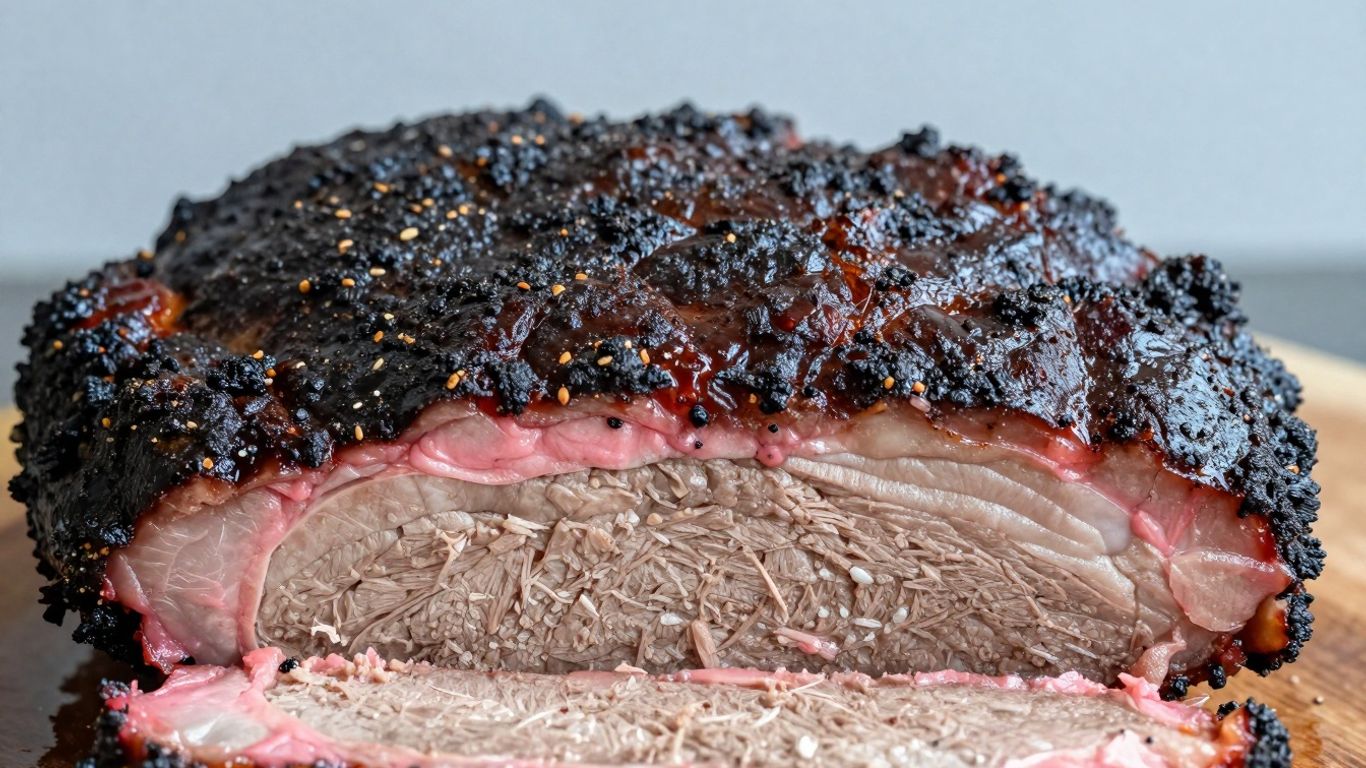
Figuring out when your smoked meat is ready can feel like a guessing game sometimes, right? You’ve put in the hours, managed the smoke, and now you’re just waiting for that perfect moment. Well, there are a few solid ways to tell, and they’re not as complicated as they might seem. It really comes down to checking the temperature and looking for some visual clues.
Internal Temperature Guidelines For Doneness
This is probably the most reliable way to know for sure. Different cuts of meat need to reach different internal temperatures to be cooked through and tender. Using a good meat thermometer is key here. You want to stick it into the thickest part of the meat, avoiding any bones.
Here are some general temperature ranges that pitmasters aim for:
- Brisket: 195–205°F (90–96°C) – This is where it gets really tender and sliceable.
- Pork Shoulder (Boston Butt): 195–205°F (90–96°C) – Aim for this range for that pull-apart tenderness.
- Pork Ribs: While temperature isn’t the only factor, ribs are generally done when the meat has pulled back from the bones and is tender. A probe should slide in with little resistance.
- Chicken (Whole or Parts): 165°F (74°C) – This is the safe temperature for poultry, but for smoking, you might push it a bit higher for more tenderness, especially with thighs.
Remember, these are target temperatures. The meat will continue to cook a little even after you take it off the smoker, so pulling it a few degrees early is often a good idea.
Recognizing Visual Cues For Readiness
Besides the thermometer, your eyes can tell you a lot. You’ll start to notice how the meat looks and feels as it cooks.
- Bark Formation: For larger cuts like brisket and pork shoulder, a nice, dark, and firm bark is a good sign. This is the flavorful crust that forms from the rub, smoke, and rendered fat.
- Probe Tender: This is a big one. Once the meat is getting close, try probing it with your thermometer probe or even a skewer. If it slides in with very little resistance, like pushing into soft butter, it’s likely ready. If you feel a lot of pushback, it needs more time.
- Fat Rendering: You’ll see the fat cap on things like brisket start to look rendered and almost liquid. This means the connective tissues are breaking down.
The Crucial Resting Period For Juices
Okay, so you’ve hit the temperature, you’ve seen the visual cues, and you’re tempted to slice into it right away. Hold on! The resting period is just as important as the smoking itself. When meat cooks, the juices get pushed to the center. If you cut into it immediately, all those delicious juices will run out onto your cutting board, leaving you with dry meat. Letting it rest allows those juices to redistribute throughout the cut. For larger cuts like brisket, this can mean resting for an hour or even longer, often wrapped in butcher paper or foil and kept in a warm place like a cooler. For smaller items like ribs or chicken, 15-30 minutes is usually sufficient. It might seem like a long wait, but trust me, it makes all the difference in the final result.
Essential Smoker Features For Consistency
Reliable Heat And Fuel Management
Getting consistent results from your smoker really comes down to keeping the heat steady. This means your smoker needs to be good at managing its fuel source, whether that’s charcoal, wood, or gas. For charcoal smokers, this often means a design that allows for good airflow and easy addition of fuel without losing too much heat. Some smokers have features like adjustable vents or a separate firebox that help with this. If you’re using a pellet smoker, an automatic feeder is a game-changer. It keeps the pellets feeding in at a steady rate, so you don’t have to constantly check and add more. This automation takes a lot of the guesswork out of maintaining temperature.
User-Friendly Design For Hassle-Free Smoking
Nobody wants to spend their entire smoking session fiddling with the equipment. A good smoker should be straightforward to use. Think about things like easy-to-clean grates, simple temperature controls, and doors that seal well to keep the smoke and heat inside. Digital interfaces are becoming more common, letting you set your temperature and time and then mostly forget about it. This frees you up to focus on other parts of the cooking process, like prepping sides or just relaxing. Magnetic doors are a nice touch, as they help keep that precious smoke from escaping.
Durable Construction For Even Cooking
The materials your smoker is made from play a big role in how evenly it cooks. Heavy-gauge steel, for instance, holds heat well and distributes it more uniformly. This prevents hot spots where food might cook too fast and cool spots where it might lag behind. Some smokers use baffle plates, which are basically metal shields placed between the heat source and the food. These help diffuse the heat, making sure it’s spread out evenly across the cooking chamber. A well-built smoker might cost a bit more upfront, but it’ll pay off in more consistent cooks and last you a lot longer.
A smoker that’s built tough and designed with heat distribution in mind will make your life so much easier. It means less time worrying about temperature fluctuations and more time enjoying the process and the delicious food you’re making.
Advanced Offset Smoker Techniques
So, you’ve got an offset smoker and you’re ready to move beyond the basics. That’s awesome! These smokers, with their separate firebox, are fantastic for that classic low-and-slow smoke flavor, but they do take a bit of finesse. Getting consistent results means really understanding how to manage that fire and smoke.
Fine-Tuning Fire Management Skills
This is probably the biggest hurdle for most folks. Keeping a steady temperature in an offset smoker is all about controlling the fire in the firebox. It’s not just about throwing wood in and hoping for the best. You need to think about how the fire burns and how that affects the heat in the cooking chamber.
- Add fuel when the existing wood has burned down to hot coals. This helps maintain a consistent heat without a big flare-up. You don’t want to add big logs when there’s already a roaring fire, nor do you want to wait until the coals are dead.
- Use splits or chunks that burn for a decent amount of time. Smaller pieces burn out fast, meaning you’re constantly tending the fire. Bigger pieces give you a more stable burn.
- Watch your temperature gauge. If it’s dropping, you know it’s time to add more fuel. If it’s climbing too high, you might need to choke down the airflow a bit.
The goal is to create a bed of coals in the firebox that provides a consistent, radiant heat, with just enough flame to produce clean smoke. It’s a balancing act between adding fuel and managing airflow.
Effective Ash Management For Airflow
As your fire burns, ash builds up. This ash can actually block the airflow to your fire, which is a big no-no. If the fire can’t breathe, it’ll smolder and produce dirty, bitter smoke, and your temperature will drop.
- Regularly clear out excess ash from the firebox. You don’t need to remove all of it, just the stuff that’s piling up and getting in the way of the coals and the air intake.
- Use a small shovel or poker to gently move the ash around and create space for air to get to the burning wood.
- Do this during longer cooks. For shorter smokes, it might not be as big of an issue, but if you’re going for 8-12 hours, ash management becomes really important.
Using Baffle Plates For Even Heat
Many offset smokers have a baffle plate or heat shield inside the cooking chamber. This isn’t just a random piece of metal; it’s designed to help distribute the heat and smoke more evenly across your cooking grates. Without it, you might find one side of your smoker is much hotter than the other.
- Understand where your baffle plate is located. It usually sits above the firebox opening and extends towards the exhaust.
- Ensure it’s clean and not obstructed. Grease and gunk can build up here too, affecting how it works.
- Experiment with its position if your smoker allows. Some baffles are adjustable, letting you fine-tune the heat distribution. You might find that moving it slightly can even out hot spots on your grates.
The Role Of Seasoning In Smoking
When you’re aiming for that perfect smoky flavor, the seasoning you use is a big deal. It’s not just about throwing some salt and pepper on there; it’s about building layers of taste that work with the smoke, not against it. A good seasoning rub can really make your meat sing, adding depth that you just can’t get from the smoke alone. It’s about making sure the flavor goes beyond just the surface.
Balancing Rub Flavors With Smoke
Think of your rub and the smoke as dance partners. You want them to complement each other, not step on each other’s toes. Some rubs are bold and spicy, while others are sweet or savory. The key is to match the intensity of your rub to the type of meat and the wood you’re using. For instance, a strong mesquite smoke might pair well with a simpler rub, letting the wood shine. On the other hand, a milder applewood smoke can handle a more complex rub with herbs and spices. It’s all about creating a harmonious flavor profile.
Ensuring Seasoning Penetrates The Meat
This is where the magic happens. You don’t want your seasoning to just sit on top like a crust. The goal is for that flavor to work its way into the meat. This happens over time, especially with low and slow cooking. Some pitmasters swear by letting their rubs sit on the meat for hours, or even overnight, before smoking. This gives the salt and other ingredients time to break down and start migrating into the muscle fibers. It’s a patient game, but the results are worth it.
Complementing Smoke Without Overpowering
Sometimes, less is more. You’re smoking meat, after all, so the smoke flavor should be a star player. If your rub is too strong, it can mask the subtle notes from the wood. This is especially true with delicate meats like fish or poultry. A simple salt, pepper, and garlic powder mix might be all you need. For bigger cuts like brisket or pork shoulder, you have more room to play with bolder flavors. It’s a balancing act, and you’ll get a feel for it with practice. Remember, you can always add more sauce later, but you can’t take away an overpowering rub.
Here’s a basic rub recipe to get you started:
- 2 tablespoons brown sugar
- 1 tablespoon smoked paprika
- 1 teaspoon garlic powder
- 1 teaspoon onion powder
- 1 teaspoon salt
- ½ teaspoon black pepper
Getting the seasoning right is a foundational step in smoking. It sets the stage for all the other flavors to come together. Don’t rush this part; give your rub time to do its work.
Practice And Experimentation For Mastery
Embracing The Learning Curve
Look, nobody gets it perfect on the first try. Smoking meat is kind of like learning to ride a bike, or maybe more like learning to juggle chainsaws. It takes time, a few bumps, and maybe a little bit of mess. Don’t get discouraged if your first brisket comes out a little dry or your ribs aren’t quite fall-off-the-bone tender. That’s just part of the process. Every cook is a chance to learn something new. Pay attention to what worked and, more importantly, what didn’t. Was the temperature all over the place? Did you use too much wood? Did you pull it off the heat too soon? Jotting down notes after each cook can be a real lifesaver for figuring out where to tweak things next time.
Trying Different Cuts And Woods
Once you’ve got a handle on the basics with a forgiving cut like pork shoulder, it’s time to branch out. Different cuts of meat behave differently on the smoker. A tough cut like brisket needs a long, slow cook to break down connective tissues, while something like chicken thighs can be done much faster. Don’t be afraid to try them all. The same goes for wood. You’ve got your classic hickory and mesquite, but have you tried fruitwoods like apple or cherry? They add a milder, sweeter smoke that pairs really well with pork and poultry.
Here’s a quick rundown of some popular wood choices and what they’re good for:
- Hickory: A go-to for many. It’s strong and smoky, great for beef and pork.
- Mesquite: Very strong, burns hot. Best used sparingly, especially with beef.
- Oak: A good all-around wood. Medium smoke flavor, works with almost anything.
- Apple/Cherry: Milder, sweeter smoke. Fantastic for pork, poultry, and even fish.
- Maple: Subtle sweetness. Good for poultry and pork.
Developing Your Signature Smoking Style
After you’ve cooked a bunch of different things and played around with various woods, you’ll start to notice what you like best. Maybe you prefer a really heavy smoke flavor, or perhaps you like it lighter. Maybe you’ve found a specific rub that just makes everything taste amazing. This is where you start to develop your own style. It’s not about copying someone else’s recipe exactly; it’s about taking what you’ve learned and making it your own. The best pitmasters have a style that’s recognizable. Don’t be afraid to get creative and put your own spin on things. That’s how you go from just following instructions to actually creating something special.
Keep Smoking, Keep Learning
So, there you have it. Getting that perfect smoky flavor and tender meat every time isn’t some big mystery. It really comes down to a few key things: starting with good meat, picking the right wood, managing your heat like a pro, and just giving it enough time. Don’t get discouraged if your first few tries aren’t exactly like the pitmasters make it look. Just keep at it, pay attention to what works and what doesn’t, and you’ll find your own rhythm. Before you know it, you’ll be pulling off amazing smoked dishes that’ll have everyone asking for your secrets.
Frequently Asked Questions
What kind of meat is best for smoking?
For smoking, cuts with a good amount of fat, like brisket, pork shoulder, and ribs, work really well. The fat helps keep the meat juicy and adds lots of flavor as it cooks slowly.
What’s the most important thing for good smoky flavor?
The type of wood you use is super important for flavor. Hardwoods like hickory, apple, or cherry give you that classic smoky taste. You can even mix different woods to create your own special flavor.
How do I prepare meat before smoking?
Before smoking, it’s good to trim off some of the really thick fat, but leave a little bit on. Then, put on a dry rub or a marinade. Let the meat sit with the seasoning for at least 30 minutes before it goes on the smoker.
Why is temperature control so important when smoking?
Keeping the temperature steady and low is key to making meat tender and juicy. If the heat is too high, the outside will cook too fast and get dry before the inside is done. It takes patience, but it’s worth it.
How much smoke is too much smoke?
You want a nice, light blue smoke, not thick, white smoke. Too much smoke can make your meat taste bitter or like it’s burning. Add wood at the beginning and then less as the meat cooks.
How can I keep my smoked meat moist?
Putting a pan of water in the smoker helps keep the air moist, which stops the meat from drying out. You can also add things like herbs or a splash of beer to the water for extra flavor.
How do I know when my smoked meat is ready to eat?
The best way is to use a meat thermometer. Different meats need different temperatures to be perfectly cooked and tender. For example, brisket and pork shoulder are usually done between 195-205°F.
What makes a good smoker for consistent results?
A good smoker should be able to hold a steady temperature without too much fuss. Features that help manage fuel and airflow easily are great. Also, a sturdy build helps cook food evenly.