
So, you want to learn how to smoke brisket for beginners? Awesome! Brisket can seem a little intimidating at first, I get it. It’s a big, expensive piece of meat, and the last thing you want is to mess it up. But honestly, it’s not as hard as it looks. With a little patience and some good tips, you’ll be pulling off a tender, juicy brisket that’ll make you feel like a total pro. We’re going to break down the whole process, from picking the right cut to slicing it up perfectly. Let’s get this smoky adventure started!
Key Takeaways
- Start with a good brisket. Look for decent marbling and an even fat cap. Prime or Choice grades are usually a safe bet.
- Trimming is important. You want to leave about a quarter-inch of fat and get rid of any hard or uneven bits.
- Keep the temperature steady, around 225-250°F, and let the smoke do its thing. Don’t rush it!
- Wrapping the brisket, usually in butcher paper or foil, helps it stay moist and push through the stall. This is often called the ‘Texas Crutch’.
- Resting is non-negotiable. Let that brisket sit for at least 30 minutes, or even a few hours, so the juices can redistribute. This makes all the difference.
Selecting and Preparing Your Brisket
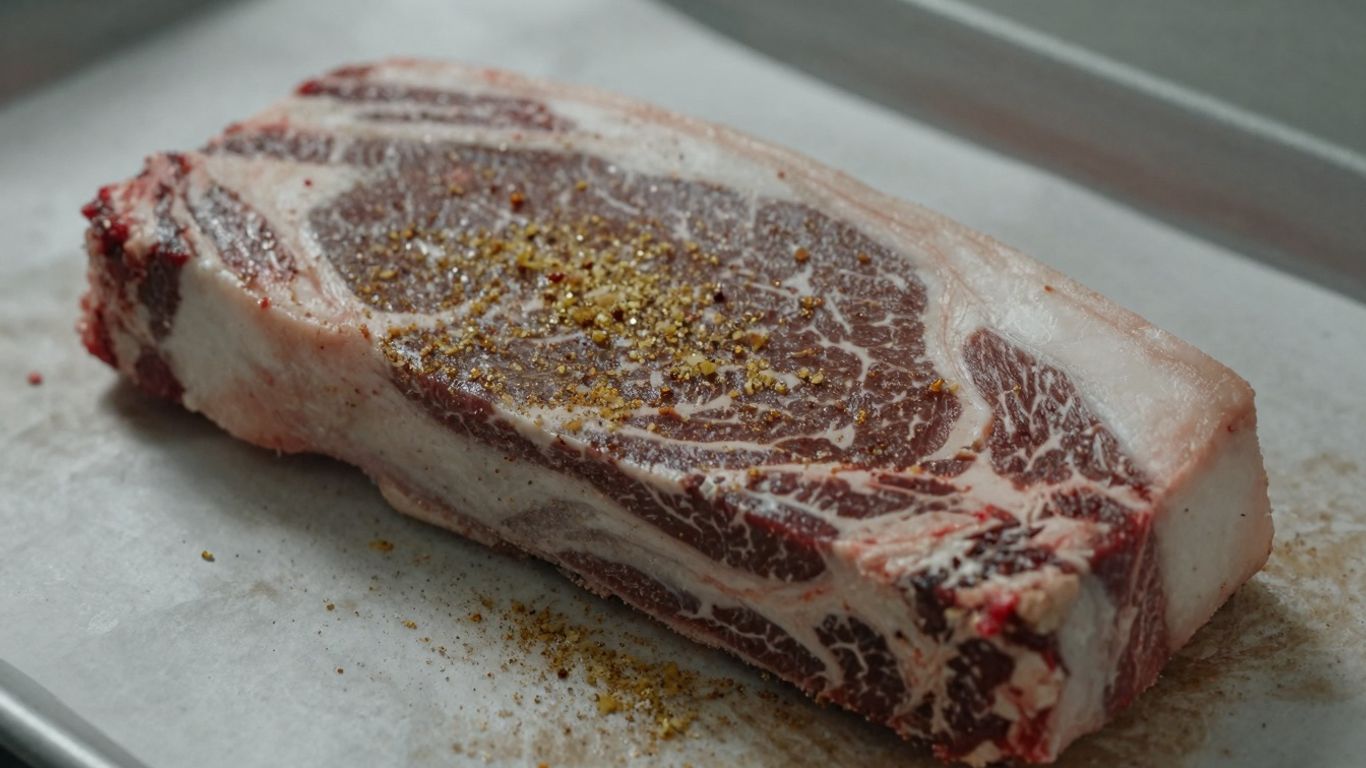
Alright, let’s talk brisket. This is where the magic really begins, even before your smoker gets fired up. Picking the right piece of meat and getting it prepped is half the battle, honestly. Don’t sweat it too much, though; it’s not rocket science, just a few key steps.
Choosing the Right Brisket Cut
When you’re at the butcher counter or grocery store, you’ll usually see briskets labeled as ‘packer’ or ‘flat’. A packer brisket is the whole deal – it includes both the ‘flat’ (leaner) and the ‘point’ (fattier) muscles. This is generally what you want for smoking because that extra fat in the point helps keep things moist during the long cook. Look for briskets that have good marbling, which is those little white flecks of fat running through the meat. That marbling melts as it cooks, adding tons of flavor and tenderness. Aim for a brisket that’s at least 10-12 pounds; smaller ones can dry out too easily. A good packer brisket is your best bet for a successful first smoke.
Understanding Brisket Trimming Essentials
Trimming is super important. You don’t want a giant slab of hard fat on there, but you also don’t want to take off too much. The goal is to get rid of the really thick, hard fat that won’t render down. Leave about a quarter-inch of softer fat on the top side (usually the fat cap). This layer protects the meat and adds moisture. You’ll also want to round off the edges a bit so the smoke can get to all the meat evenly. Think of it as shaping the brisket for a better cook. It might feel weird cutting into a nice piece of meat, but trust me, it’s necessary.
The Art of Seasoning Your Brisket
This is where you can get creative, but for your first time, keeping it simple is usually best. A classic Texas-style rub is just coarse salt and black pepper, often in a 50/50 mix. Some folks like to add garlic powder or onion powder, and that’s fine too. The key is to apply the rub generously all over the brisket, making sure to get into all the nooks and crannies. Don’t be shy with it! After you’ve seasoned it, it’s a good idea to let it sit in the fridge, uncovered, for at least a few hours, or even overnight. This helps the salt penetrate the meat and start to dry-brine it, which really helps develop a great bark later on. It’s a simple step that makes a big difference in the final flavor.
Mastering the Smoking Process
Setting Up Your Smoker for Success
Getting your smoker ready is more than just lighting it up. You want a stable environment for that brisket to cook evenly. For most smokers, aiming for a consistent temperature is key. Many folks find that keeping the smoker between 225°F and 250°F works best for brisket. This low and slow approach allows the tough connective tissues in the brisket to break down, making it tender. If you’re using a pellet grill, settings like ‘Smoke’ or ‘Super Smoke’ can add extra flavor, but remember, the main goal is temperature control. For traditional smokers, you’ll need to manage your fuel source, whether it’s charcoal or wood, to maintain that target temperature for hours on end. It’s a bit of a dance, but getting this right from the start makes a huge difference.
Optimal Temperature Ranges for Brisket
When it comes to temperature, consistency is king. Most pitmasters agree that the sweet spot for smoking brisket is between 225°F and 250°F. Going much hotter can rush the cooking process, potentially leading to a dry or tough brisket. On the flip side, if it’s too low, you’ll be looking at an extremely long cook time, and you might not get the best texture. Think of it like this: you’re giving the meat plenty of time to relax and become tender without drying out. This temperature range is also great for developing that coveted smoky flavor and a beautiful bark. Remember, this is for the smoker’s temperature, not the internal temperature of the meat.
Fat Side Up or Down: A Smoker’s Dilemma
This is a question that sparks a lot of debate among barbecue enthusiasts. The general idea behind putting the fat side up is that the rendering fat will baste the meat as it cooks, adding moisture and flavor. However, some argue that fat side down can protect the meat from direct heat, especially if your heat source is primarily from below. Honestly, for most modern smokers, the difference might be minimal. What’s more important is how your smoker distributes heat. If you have hot spots, you might want to position the brisket to shield the leaner side. Many experienced cooks will tell you that the internal temperature and the overall cooking environment play a much bigger role than which way the fat cap is facing. It’s worth experimenting to see what works best for your setup.
The goal is to create an environment where the brisket can slowly cook, allowing tough connective tissues to break down into gelatin, which makes the meat tender and moist. This low and slow method is what separates good brisket from great brisket.
The Crucial Cooking Stages
Alright, so you’ve got your brisket prepped and seasoned, and the smoker is humming along. Now comes the part where patience really pays off. We’re talking about the actual cooking process, and there are a few key moments that can make or break your brisket.
When to Wrap Your Brisket
This is a big one, and honestly, there’s no single right answer. Many folks wrap their brisket, and it’s often done to push through something called ‘the stall.’ You’ll notice it when your brisket’s internal temperature hovers around 150-170°F for what feels like forever. It’s basically the meat cooling itself down through evaporation. Wrapping helps keep that moisture in and can speed things up.
- Early Wrap: Some people wrap after just a few hours, maybe when the bark looks good.
- Mid-Cook Wrap: A common time is when you hit that stall, around 160-170°F.
- No Wrap: Others swear by never wrapping, letting the brisket do its thing naturally. This usually means a longer cook time.
Wrapping isn’t just about speed; it’s also a way to manage your smoke. If your smoker is putting out a really heavy smoke, wrapping can help prevent the brisket from getting too acrid.
Choosing Your Wrapping Material: Foil vs. Butcher Paper
If you decide to wrap, you’ve got two main choices, and they give different results.
- Aluminum Foil (The "Texas Crutch"): This is like a tight seal. It traps moisture really well and will definitely push you through the stall faster. The downside? It can soften your bark, making it less crispy.
- Butcher Paper: This is a bit more breathable. It still helps with the stall and moisture retention, but it tends to preserve that beautiful bark better than foil. It’s a popular choice for many pitmasters.
Monitoring Brisket Doneness
This is where you really need to trust your senses and your thermometer. Forget strict time charts; briskets are individuals.
- Temperature: Most people aim for an internal temperature of around 200-205°F. But temperature alone isn’t the whole story.
- Probe Tender: This is the real test. When you insert a thermometer probe (or a skewer) into the thickest part of the flat, it should slide in with almost no resistance. Think of it like probing hot butter. If you feel any tightness, it needs more time.
- Feel: The brisket should feel soft and pliable when you gently squeeze it (use gloves, it’s hot!). It shouldn’t feel stiff or firm.
Achieving That Perfect Bark
Alright, let’s talk about the bark. That dark, flavorful crust on the outside of your brisket is what a lot of people dream about. It’s not just about looks; it’s where a lot of that smoky, savory goodness really happens. Getting it right takes a little attention, but it’s totally doable.
The Role of Spritzing During the Cook
Spritzing is basically giving your brisket a little drink while it’s smoking. It helps keep the surface moist, which is key for smoke to stick and for that bark to form properly without drying out. You don’t want to drown it, just a light misting.
- When to Start: Usually, you’ll start spritzing a few hours into the smoke, around the time you notice the color deepening and the bark starting to set. Think of it as helping the seasoning adhere better.
- What to Use: Simple is often best. Apple cider vinegar, water, beef broth, or a mix of these work great. Some folks add a little Worcestershire sauce or hot sauce for an extra kick.
- How Often: Don’t go crazy. Every 45 minutes to an hour is a good general rule. You’re aiming to keep the surface damp, not soaking wet.
Spritzing helps build layers of flavor and moisture, contributing to a better overall texture and a more appealing exterior. It’s a small step that can make a noticeable difference in the final product.
Developing a Deep, Flavorful Crust
The bark is a combination of your rub, the smoke, and the rendering fat. It’s that beautiful dark color and slightly chewy texture that contrasts so nicely with the tender meat inside.
- Rub is Key: Your seasoning blend is the foundation. A simple mix of coarse salt and black pepper is classic for a reason, letting the beef and smoke shine. You can add garlic powder, onion powder, or a touch of paprika for color and subtle flavor.
- Smoke Time: The longer the brisket is exposed to smoke at the right temperature, the more that bark will develop. Low and slow is your friend here.
- The ‘Texas Crutch’: Wrapping your brisket, usually in butcher paper or foil, is often done to push through the stall and retain moisture. While some worry it can soften the bark, the right technique, especially with butcher paper, can still allow for a fantastic crust while keeping the meat juicy.
The goal is a bark that’s dark, flavorful, and has a bit of texture, but doesn’t overpower the rich taste of the beef itself.
Understanding Brisket Cook Times
Figuring out how long to smoke a brisket can feel like a guessing game, right? It’s not an exact science, and honestly, that’s part of the fun. But there are some solid guidelines that can help you plan your cook.
Factors Influencing Brisket Cooking Duration
Several things play a role in how long your brisket will take to get to that perfect tender stage. It’s not just about the weight, though that’s a big one. The thickness of the brisket matters too – a thicker cut will take longer than a thinner one, even if they weigh the same. Your smoker’s temperature is another key player. If you’re running it hotter (say, 275°F or even 300°F), it’ll cook faster than at a cooler 225°F. And don’t forget the environment! A really cold, windy day can make your smoker work harder and potentially slow things down.
- Brisket Weight: Generally, plan for about 1 to 1.5 hours per pound at a steady 225-250°F. So, a 12-pound brisket might take anywhere from 12 to 18 hours.
- Smoker Temperature: Higher temps speed up the cook, but can sometimes sacrifice bark development or moisture if not managed carefully.
- Brisket Thickness: Thicker briskets need more time for the heat to penetrate evenly.
- Ambient Conditions: Cold or windy weather can increase cook times.
The ‘Probe Tender’ Indicator
While we can estimate times, the real boss of brisket cooking is the internal temperature and, more importantly, the feel. You’re aiming for ‘probe tender,’ which means a thermometer probe slides into the thickest part of the brisket with very little resistance, like pushing it into room-temperature butter. This usually happens when the brisket hits an internal temperature between 195°F and 205°F, but don’t just rely on the numbers. Some briskets might be probe tender at 198°F, while others need to get to 205°F. Always trust the feel over the clock or a specific temperature reading.
The biggest mistake first-timers make is pulling the brisket off the heat too early because they think it’s ‘done’ based on time alone. It’s better to let it cook a little longer and be perfectly tender than to rush it and end up with a tough piece of meat. Patience is truly a virtue when it comes to brisket.
Here’s a rough guide, but remember, these are just estimates:
| Brisket Weight | Estimated Cook Time (at 225-250°F) | Target Internal Temp (for probing) |
|---|---|---|
| 10 lbs | 10-15 hours | 195-205°F |
| 12 lbs | 12-18 hours | 195-205°F |
| 15 lbs | 15-22 hours | 195-205°F |
Always have a reliable meat thermometer handy. It’s your best friend for knowing when your brisket is actually ready to come off the smoker.
The Importance of Resting Brisket
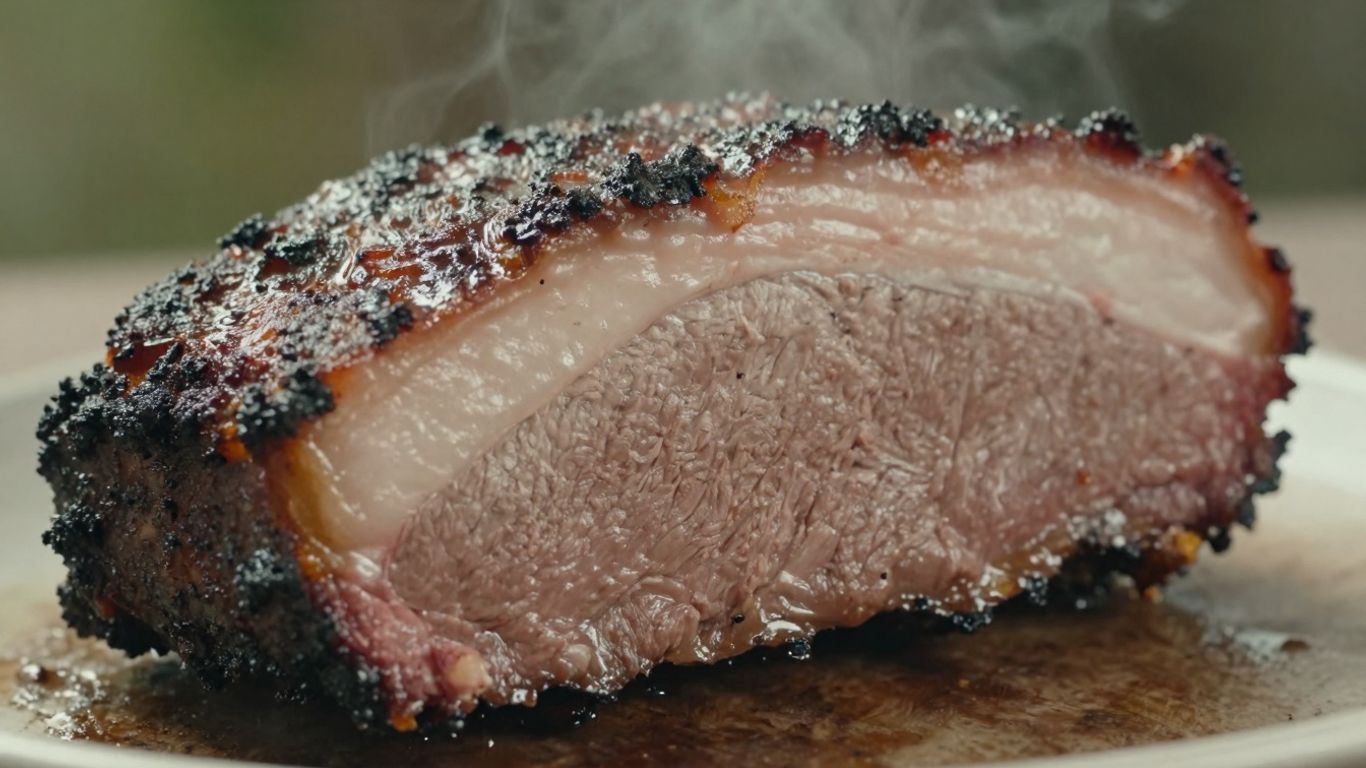
Alright, so you’ve wrestled that big ol’ brisket into submission, it’s hit that perfect temperature, and the bark looks like a work of art. You’re probably thinking, "Time to slice and devour!" Hold your horses, my friend. There’s one more step, and honestly, it’s just as important as the smoking itself: resting.
Why Resting is Non-Negotiable
Think about it. While your brisket has been hanging out in the heat for hours, all those delicious juices have been pushed to the surface. If you slice into it right away, those juices are just going to run out onto your cutting board, leaving you with a dry piece of meat. Resting lets those juices settle back down and redistribute throughout the brisket. This is the secret sauce to a moist and tender brisket. It’s like letting a tense muscle relax after a long workout; it just makes everything better.
Methods for Resting Brisket
So, how do you give your brisket the spa treatment it deserves? There are a few ways to go about it, depending on your timeline.
- Short and Sweet (30 minutes to 1 hour): If you’re serving it up pretty quickly after it’s done, you can let it rest on the counter, loosely tented with foil. Just make sure it’s not getting cold.
- The Cooler Method (2-4 hours): This is a popular choice for a reason. Wrap your brisket tightly in foil or butcher paper, then wrap that whole package in a few old towels. Shove it all into a good quality insulated cooler. This keeps the brisket warm for a good long while, letting those juices work their magic.
- The Extended Stay (4+ hours): If you’ve got the time and a reliable way to keep things warm without cooking them further (like a warming oven set very low, or just a really, really good cooler), you can rest it for longer. The key here is to keep the internal temperature above 140°F for food safety.
Resting isn’t just about keeping the meat warm; it’s about allowing the internal structure of the brisket to relax. This relaxation phase is what makes the meat easier to slice and incredibly tender to eat. Skipping this step is like running a marathon and stopping right before the finish line – you’ve done all the hard work, but you’re missing out on the full reward.
Don’t rush this part. Patience here will pay off big time when you take that first bite.
Slicing for Maximum Tenderness
Alright, you’ve done the hard part – smoking that beautiful brisket. Now comes the moment of truth: slicing it. Get this wrong, and all that effort can go to waste. But do it right, and you’ll have melt-in-your-mouth tender brisket. It’s all about understanding the meat.
Identifying the Grain of the Brisket
Brisket is made of two main muscles, the flat and the point, and they run in different directions. Think of it like wood grain. If you cut with the grain, you get tough, chewy meat. Cut against the grain, and it falls apart. The trick is figuring out which way that grain is going. Sometimes, after smoking, the bark can make it a little tricky to see. A good trick is to cut a small notch from a corner before you start smoking, perpendicular to the grain of the flat. This gives you a reference point later.
Proper Slicing Techniques
First things first, let that brisket rest. Seriously, don’t skip this. It lets the juices redistribute. Once it’s rested, you’ll want a long, sharp knife. Separate the flat from the point. The flat muscle runs one way, and the point runs another. Slice the flat against its grain. Then, take the point, rotate it 90 degrees, and slice it against its grain. This might mean some slices don’t have bark on every side, but tenderness is the goal here.
- Separate the flat and the point: Find the thick layer of fat between them and slice along it.
- Slice the flat: Identify the grain and cut across it.
- Slice the point: Rotate the point 90 degrees and cut across its grain.
- Avoid scraping the bark: Try to keep that delicious crust intact as you slice.
Slice Thickness Guide
This is where personal preference really comes in, but a good starting point is about pencil-thick. For the leaner flat, aim for the thickness of a smaller pencil. For the fattier, more marbled point, you can go a bit thicker, like a larger pencil. The key is consistency within each section. Too thin, and it can dry out. Too thick, and it might be a bit chewy if you missed the grain slightly.
The goal is to create slices that are easy to chew and packed with flavor. If your brisket is cooked properly and rested well, even a slightly imperfect slice will still be tender. Don’t stress too much about perfection on your first try; focus on the technique and the taste.
Essential Tools for Brisket Smoking
Alright, so you’re ready to tackle that brisket. That’s awesome! Before you even think about firing up the smoker, let’s talk about what you’ll actually need to get the job done. You don’t need a whole professional kitchen, but having the right gear makes a huge difference. Trust me on this.
Choosing the Right Smoker
This is probably the biggest decision you’ll make. There are a few main types out there, and each has its own vibe. Pellet smokers are super popular for beginners because they’re pretty set-and-forget when it comes to temperature. You just set the dial, and it does its thing. Offset smokers, the classic ones, give you more control and a really authentic smoke flavor, but they take more attention to keep the heat steady. Charcoal grills can also work, but you’ll need a good thermometer to keep an eye on things. The key is finding a smoker that can hold a consistent temperature, usually between 200°F and 250°F, for a long time.
Reliable Meat Thermometers
Look, you can guess when your brisket is done, but why would you? A good meat thermometer is non-negotiable. You’ll want at least two types:
- Instant-read thermometer: This is for quick checks. You’ll use it to probe different parts of the brisket to get an average temperature and to check for tenderness. The Thermapen ONE is a popular choice, but honestly, any fast and accurate one will do.
- Leave-in probe thermometer: This one stays in the brisket the whole time it’s smoking. It’s usually connected to a base unit or a wireless receiver, so you can monitor the internal temperature without opening the smoker door and losing heat. This is super important for tracking the cook and knowing when you’re getting close.
Cutting and Serving Utensils
Once that brisket is cooked to perfection and has rested, you need to slice it. Don’t try to hack through it with a dull butter knife, okay? You’ll want a good, sharp chef’s knife. Seriously, a sharp knife makes all the difference. And for goodness sake, get a big cutting board. A large one with a groove around the edge is ideal because briskets can release a lot of juice when you slice them. You don’t want all that liquid gold running off your counter.
Having the right tools isn’t about showing off; it’s about making the process smoother and increasing your chances of success. When you’re investing hours into smoking a brisket, you want to make sure you have what you need to see it through to the delicious end. It’s like having the right paintbrushes for an artist – they help you create your masterpiece.
Other Handy Gadgets
While not strictly required, a few other things can make your life easier:
- Butcher paper: If you plan on wrapping your brisket (and most people do), good quality butcher paper is a game-changer for developing that perfect bark without steaming the meat too much.
- Spritz bottle: For those who like to spritz their brisket during the cook to keep it moist and help the bark form, a simple spray bottle is all you need.
- Tongs and a large spatula: You’ll need these for moving the brisket around, especially when you’re wrapping it or taking it off the smoker.
Wood Selection for Brisket Flavor
Alright, let’s talk about the wood you’re gonna use to smoke your brisket. This is where a lot of the magic happens, honestly. The type of wood you choose really does make a difference in the final taste of your brisket, giving it that signature smoky flavor.
Popular Wood Choices for Brisket
When it comes to brisket, you want woods that can stand up to the long cooking time and complement the rich beef flavor. Here are some of the go-to options:
- Hickory: This is a classic for a reason. It gives a strong, bold, and somewhat bacon-like smoke flavor that’s fantastic with beef. It’s a workhorse wood.
- Oak: A bit milder than hickory, oak provides a more subtle smoke. It’s often used in Texas-style BBQ and is great if you want the beef to be the star, with just a hint of smoke.
- Mesquite: This one is intense! Mesquite gives a very strong, earthy flavor. You have to be careful with it, as too much can overpower the meat, but used right, it’s amazing.
- Pecan: If you like a slightly sweeter, nuttier smoke, pecan is a great choice. It’s a bit milder than hickory but still offers a good amount of flavor.
- Fruitwoods (Apple, Cherry): These are generally milder and sweeter. Cherry can give a nice reddish hue to your bark, and apple is super mild, good for beginners or if you want a very delicate smoke.
Matching Wood to Your Desired Smoke Profile
Think about what kind of flavor you’re aiming for. Are you going for that deep, traditional Texas smoke, or something a little different?
- For a Bold, Robust Flavor: Hickory or Mesquite are your best bets. You might even mix them if you’re feeling adventurous.
- For a Balanced, Classic Smoke: Oak is a solid choice. Many pitmasters use oak as their primary wood.
- For a Sweeter, Milder Smoke: Pecan, Apple, or Cherry are excellent. They add a nice complexity without being overwhelming.
- For a Unique Twist: Consider blends. Mixing a stronger wood like hickory with a milder one like apple or cherry can give you a really interesting flavor profile. Some folks even like adding a bit of coffee grounds or a specific wood blend with whiskey notes for an extra layer.
The key is to experiment. What one person loves, another might find too strong or too mild. Start with a popular choice like oak or hickory, and then as you get more comfortable, try different woods or combinations to find your perfect brisket smoke.
Don’t be afraid to mix woods either. A common practice is to combine a stronger wood like hickory with a milder fruitwood like apple or cherry. This can give you a more complex flavor that’s robust yet balanced. Some people even add a small amount of mesquite for an extra kick, but use that sparingly – it’s potent stuff!
Troubleshooting Common Brisket Issues
Avoiding Dry Brisket
Dry brisket is the bane of many a beginner’s existence. It usually happens when the meat cooks too long or at too high a temperature, or if it’s not rested properly. Another culprit can be trimming off too much of the fat cap; that quarter-inch layer is there for a reason, folks! It bastes the meat as it cooks. If you’re worried about it, try cooking fat-side down to shield it from direct heat, or fat-side up so it renders down and self-bastes. Also, don’t skip the rest! Seriously, it’s where the magic happens and juices redistribute. If you’re really struggling, consider wrapping it earlier in the cook to help retain moisture.
Dealing with the Brisket Stall
Ah, the dreaded stall. This is when the brisket’s internal temperature seems to just stop climbing, often hovering around the 150-165°F mark. It’s basically caused by evaporative cooling – moisture is coming to the surface and evaporating, which cools the meat down. It’s a natural part of the process, but it can be frustrating.
Here’s how to handle it:
- Wrap it up: This is the most common solution. Wrapping your brisket in butcher paper or foil (the "Texas Crutch") traps the heat and moisture, pushing through the stall. Most folks wrap when they hit around 160-165°F internal.
- Be patient: If you’re not in a hurry and you’re aiming for a specific bark, you can just let it ride. It will eventually break through the stall on its own, but it can take a while.
- Bump the temp (carefully): Some pitmasters will slightly increase the smoker temperature after the stall, but do this with caution. You don’t want to overcook the outside while waiting for the inside to catch up.
The stall isn’t a sign that something’s gone wrong; it’s just a phase. Think of it as the brisket taking a breather before the final push to tenderness. Understanding why it happens is half the battle, and knowing you can wrap it gives you control over the timeline.
You Did It!
So, you’ve tackled your first brisket. It might not have been perfect, and that’s totally okay. Brisket is a tough cut, and honestly, it takes practice. Don’t get discouraged if it’s not exactly like the pictures. The important thing is you tried, you learned, and you’ve got a whole new skill under your belt. Keep at it, experiment with rubs, play with your smoker’s temperature, and before you know it, you’ll be pulling off brisket that’ll make your friends and family seriously impressed. Now go enjoy that delicious, smoky meat!
Frequently Asked Questions
What’s the best way to pick a brisket?
When you’re picking out a brisket, look for one that has good marbling, which means you see little flecks of fat mixed into the meat. This fat melts as it cooks, making the brisket super juicy and tasty. Also, try to find a piece that’s pretty thick all the way around and has a nice, even layer of fat on top, called the fat cap. Grades like ‘Choice’ or ‘Prime’ are usually a good bet for quality.
How much fat should I leave on the brisket?
You’ll want to trim off most of the thick, hard fat, but leave about a quarter of an inch of the softer fat on the meat. This thin layer of fat helps keep the brisket moist while it cooks and also helps the smoke flavor get into the meat. Too much fat can make it greasy, though, so finding that right balance is key.
What’s the deal with fat side up or fat side down?
This is a big debate among smokers! Many people like to put the brisket fat side up, thinking the fat will melt down and baste the meat. However, if your smoker’s heat comes mostly from the bottom, putting the fat side down can act like a shield, protecting the meat from drying out too much. It really depends on how your smoker works.
When should I wrap my brisket?
You’ll usually want to wrap your brisket when the bark, or the dark crust on the outside, has formed nicely. This is often around the 6-8 hour mark, but it can vary. Wrapping helps keep the brisket moist and can speed up the cooking process, especially if it hits a ‘stall,’ where the temperature stops rising.
What’s the difference between wrapping in foil and butcher paper?
Foil creates a tighter seal, which helps push moisture into the meat and can speed up cooking. It often results in a softer bark. Butcher paper, on the other hand, breathes more, allowing some steam to escape. This helps create a crispier bark while still keeping the brisket moist. Many folks prefer butcher paper for that perfect bark.
How do I know when my brisket is done cooking?
The best way to tell if your brisket is done is by feel, not just by temperature. It should feel ‘probe tender,’ meaning when you insert a thermometer probe, it goes in with very little resistance, like sliding into warm butter. Most briskets are done between 195°F and 205°F internally, but always trust the feel.
Why is resting the brisket so important?
Resting is super important! After smoking for many hours, the muscle fibers tighten up. Resting allows those fibers to relax and the juices to redistribute throughout the meat. If you slice it too soon, all those delicious juices will just run out, leaving you with dry brisket. Resting for at least 30 minutes, or even a few hours, makes a huge difference in tenderness.
How do I slice brisket correctly?
The most important rule for slicing is to always cut *against* the grain. Look closely at the meat; you’ll see lines (the grain). Slicing perpendicular to those lines makes the meat much more tender. If you’re slicing the flat part, you might need to turn the brisket 90 degrees to find the grain for the point section.