
Alright, so you’re looking to up your BBQ game and really wow your friends and family. Pork is a fantastic choice for that. It’s so versatile, you can smoke it low and slow until it falls apart, grill it up for a quick meal, or even turn it into something totally different. We’ve put together a list of some of the best BBQ recipes for pork that are sure to be a hit at your next get-together. Forget boring chicken, it’s time to get serious about pork.
Key Takeaways
- From ribs that are fall-off-the-bone tender to pulled pork that’s juicy and packed with flavor, there’s a pork recipe for every occasion.
- Don’t shy away from different cuts of pork; pork shoulder makes amazing pulled pork, while pork chops are great for quick grilling or smoking.
- Experiment with different flavors, whether it’s sweet glazes, smoky rubs, or even fruity combinations like bourbon peach.
- Many of these recipes are designed to be approachable, even if you’re not a seasoned pitmaster.
- The focus is on simple, delicious ways to prepare pork that will impress your guests without being overly complicated.
1. 3-2-1 Ribs
Alright, let’s talk ribs. The 3-2-1 method is a classic for a reason, and it’s a fantastic way to get fall-off-the-bone tender ribs without a ton of fuss. It’s all about timing and a little bit of wrapping magic. This technique breaks down the cooking process into three distinct stages, each building on the last to create perfectly cooked ribs.
Here’s the basic breakdown:
- 3 Hours: This is your initial smoke time. Get your ribs on the smoker at a low temperature, usually around 225-250°F (107-121°C). This is where the smoke flavor really starts to penetrate the meat.
- 2 Hours: Now, we wrap. Take the ribs off the smoker, wrap them tightly in foil (maybe with a little liquid like apple juice or butter), and put them back on. This steaming phase helps to tenderize the meat even further.
- 1 Hour: Uncover the ribs, sauce them up if you like, and put them back on the smoker for this final hour. This is where you get that nice glaze and a bit of a bark to form.
It sounds simple, and it is, but the results are seriously impressive. You get that tender texture that everyone loves, with a great smoky flavor. It’s a crowd-pleaser for sure.
The beauty of the 3-2-1 method is its flexibility. While the times are a guide, you can adjust them slightly based on your smoker, the thickness of your ribs, and your personal preference for tenderness. Don’t be afraid to experiment a little to find what works best for you.
2. Easy Smoky BBQ Pulled Pork
Alright, let’s talk about pulled pork. This isn’t some fancy, complicated dish. It’s the kind of food that makes people happy, the kind you can pile high on a bun and just go to town on. The beauty of this recipe is its simplicity; you don’t need a million ingredients or a degree in pitmastery to get fantastic results.
We’re talking about pork shoulder, also known as Boston butt. It’s a cut that’s perfect for low and slow cooking because it has enough fat to stay moist and tender. The goal here is to break down all that connective tissue until the meat just falls apart.
Here’s a basic rundown of how it usually goes:
- Prep the Pork: Start with a good rub. You can buy one or make your own. Just make sure it has a nice balance of savory and a little bit of sweet.
- Smoke it Low and Slow: Get your smoker going at a low temperature, usually around 225-250°F (107-121°C). You want to give that pork plenty of time to absorb that smoky flavor.
- Rest and Shred: Once it’s reached the right temperature and is probe-tender, let it rest. Then, the fun part: shredding it with two forks until it’s nice and pull-apart.
- Sauce it Up: Mix in your favorite BBQ sauce. You don’t want to drown it, just coat it enough to add that extra layer of flavor.
This method focuses on letting the pork shine. The smoke does most of the heavy lifting, and a good rub adds depth. It’s about patience and letting the heat and smoke work their magic over several hours. The result is incredibly tender meat with a delicious crust.
It might take a good chunk of the day, but honestly, the smell alone is worth it. Plus, you’ll have plenty of leftovers, which is always a win in my book.
3. Carolina Pulled Pork
Carolina style pulled pork is a true classic, and for good reason. It’s all about the pork shoulder, cooked low and slow until it’s fall-apart tender, then tossed with a tangy, vinegar-based sauce. This isn’t your super-sweet, sticky BBQ sauce; Carolina style is all about that bright, acidic kick that cuts through the richness of the pork.
The magic really happens with the sauce. It’s typically a simple mix of apple cider vinegar, a little bit of brown sugar or honey for balance, and some red pepper flakes for a touch of heat. Some folks add a bit of ketchup, but purists often stick to just vinegar and spices. It’s a flavor profile that’s been perfected over generations.
Here’s a general idea of how you might approach it:
- Start with a Pork Shoulder: A bone-in or boneless pork shoulder (also called a Boston butt) is your best bet. It has enough fat to stay moist during the long cooking process.
- Season Generously: A simple rub of salt, black pepper, and maybe some garlic powder is all you really need. The sauce will bring the main flavor.
- Low and Slow Cooking: Smoke it for several hours until the internal temperature reaches around 195-205°F (90-96°C). You want it probe-tender, meaning a thermometer slides in with very little resistance.
- Shred and Sauce: Once it’s cooked and rested, shred the pork. Then, toss it with your prepared Carolina-style vinegar sauce. You can add more sauce as needed to get it just right.
This method results in incredibly moist and flavorful pulled pork that’s perfect for sandwiches. The tanginess of the sauce complements the smoky, rich pork without overpowering it. It’s a taste of BBQ history.
Serve it up on soft buns with a side of coleslaw, and you’ve got a meal that’s hard to beat. It’s simple, honest, and absolutely delicious.
4. Cherry Cola Pulled Pork
Alright, let’s talk about Cherry Cola Pulled Pork. This recipe is a bit of a sweet surprise, and honestly, it works way better than you might think. The idea is to use cherry cola as a braising liquid, and it really does add a unique flavor profile that complements the pork beautifully.
The magic happens when the cola caramelizes during the cooking process, creating a sticky, flavorful bark. It’s not overly sweet, mind you. The cola breaks down, and the cherry notes mingle with the smoky essence from the grill or smoker, creating something pretty special.
Here’s a general idea of how it comes together:
- Prep the Pork: Start with a good cut of pork, usually a pork shoulder or Boston butt. Give it a good rub with your favorite BBQ spices – think paprika, garlic powder, onion powder, a little brown sugar, and some salt and pepper. Don’t be shy with the rub; it’s going to form the base of that delicious bark.
- The Braising Liquid: Place the seasoned pork in a foil pan or Dutch oven. Pour in enough cherry cola to come about halfway up the sides of the meat. You can add a few extra flavor boosters here too, like a splash of Worcestershire sauce or some sliced onions.
- Low and Slow Cooking: Cover the pan tightly and cook it low and slow. Whether you’re using a smoker, an oven, or even a slow cooker, you want to aim for temperatures around 225-275°F (107-135°C) for several hours. The pork is done when it’s super tender and easily pulls apart with a fork.
- Shred and Sauce: Once cooked, pull the pork apart using two forks. You can then mix some of the braising liquid back in to keep it moist, or add your favorite BBQ sauce. Some folks like to finish it under the broiler for a few minutes to get a little extra crisp on the edges.
This method is fantastic for getting incredibly moist and flavorful pulled pork without a ton of complicated steps. The cola does a lot of the heavy lifting, infusing the meat with a subtle sweetness and fruity undertone that’s really quite delightful.
It’s a great way to switch things up from your standard pulled pork recipe and is sure to get some compliments at your next cookout. Just make sure you have plenty of buns ready!
5. Cider Brined Pulled Pork
Alright, let’s talk about cider brined pulled pork. This isn’t your average pulled pork; the brine adds a whole other level of moisture and a subtle fruity note that really makes it stand out. If you’re looking to impress without a ton of complicated steps, this is a solid choice.
The brine is where the magic happens, infusing the pork with flavor and keeping it super tender. It’s a simple mix, usually involving apple cider, some salt, and a bit of sugar, maybe a few aromatics like peppercorns or bay leaves. You let the pork shoulder sit in this mixture for a good chunk of time, usually overnight, to really let it soak it all in.
Here’s a general idea of what goes into the brine:
- 1 gallon apple cider
- 1 cup kosher salt
- 1/2 cup brown sugar
- 1 tablespoon black peppercorns
- 2 bay leaves
After brining, you’ll smoke it low and slow, just like you would any other pulled pork. The cider in the brine helps create a fantastic bark and keeps the meat incredibly juicy, even after hours on the smoker. It’s a forgiving cut, so even if you’re a bit new to smoking, this recipe tends to turn out great.
This method really helps to break down the connective tissues in the pork shoulder, making it fall-apart tender. The apple cider also adds a slight tang that balances the richness of the pork beautifully. It’s a subtle difference, but one that guests will definitely notice and appreciate.
When it’s all said and done, you’ll have some of the most tender, flavorful pulled pork you’ve ever had. Serve it up on buns with your favorite slaw, and you’ve got a winner.
6. Bourbon Brown Sugar Pulled Pork
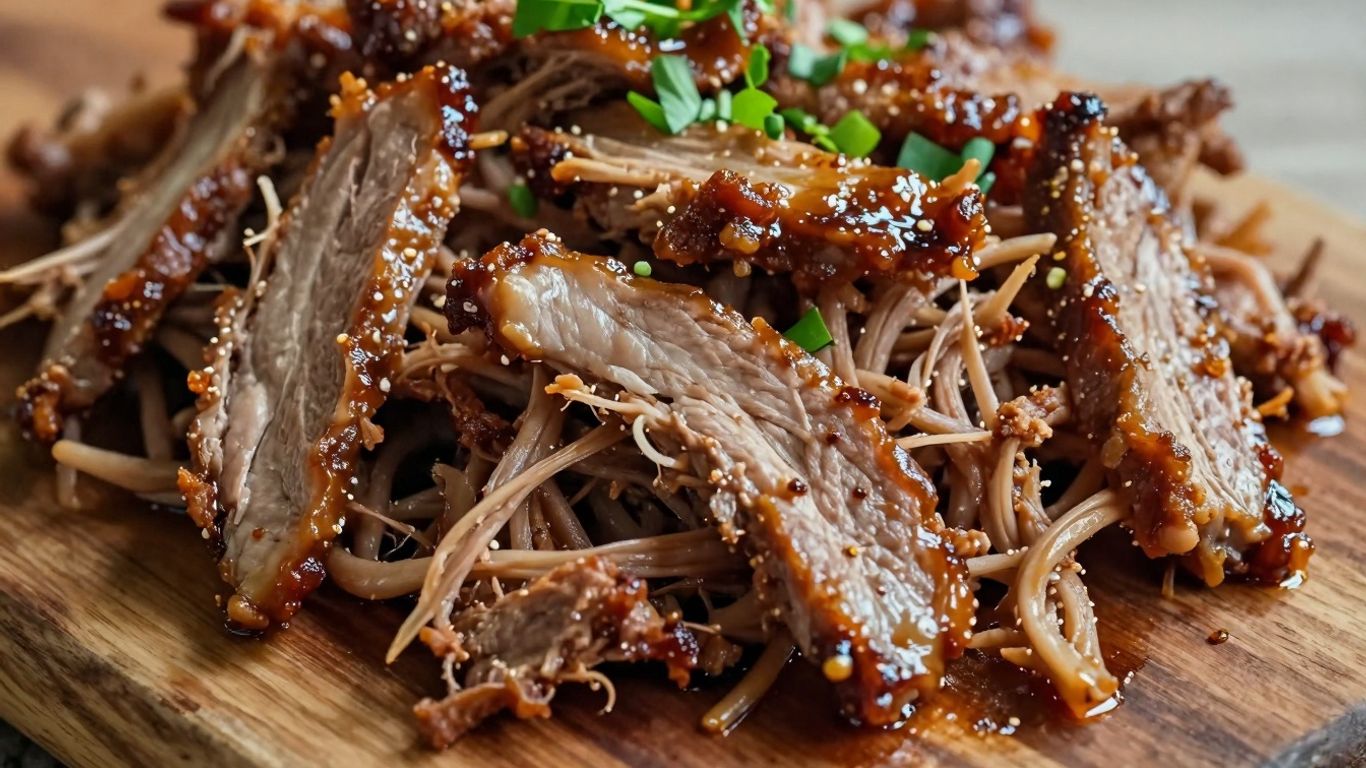
This pulled pork recipe is a real winner, combining the deep, rich flavors of bourbon with the sweet caramel notes of brown sugar. It’s the kind of dish that makes your whole house smell amazing while it’s cooking, and honestly, the aroma alone is worth the effort.
The magic really happens with the low and slow cooking method, which breaks down the pork shoulder into incredibly tender, juicy strands. You get this fantastic bark on the outside from the sugar caramelizing, and the bourbon adds a subtle depth that you just can’t get any other way. It’s not overpowering, just a nice background note that complements the sweetness.
Here’s a basic rundown of what you’ll need:
- 1 bone-in pork shoulder (about 5-7 pounds)
- 1/2 cup brown sugar
- 1/4 cup bourbon
- 1/4 cup apple cider vinegar
- Your favorite BBQ rub
When it comes to the bourbon, don’t feel like you need to break out the top shelf stuff. A decent mid-range bourbon works perfectly fine here. The alcohol cooks off, leaving behind that lovely flavor. I usually find myself reaching for a bottle of Maker’s Mark for this kind of recipe.
The process involves rubbing the pork shoulder generously with your favorite BBQ rub, then letting it smoke at a low temperature for several hours. Towards the end, you’ll introduce the bourbon and brown sugar mixture, often by wrapping the pork to help it braise and tenderize further. This creates that signature sticky, sweet glaze that everyone loves.
This recipe is pretty forgiving, which is great if you’re still getting the hang of smoking. The pork shoulder is a tough cut, so it can handle a long cooking time without drying out. Just keep an eye on the temperature and let it do its thing. The result is a pulled pork that’s perfect for sandwiches, tacos, or just eating straight off the plate.
7. Buffalo Smoked Pulled Pork
Alright, let’s talk about Buffalo Smoked Pulled Pork. This isn’t your average pulled pork; we’re kicking things up a notch with that classic Buffalo flavor. Imagine tender, smoky pork infused with the tangy, spicy kick of buffalo sauce. It’s a combination that just works, and it’s surprisingly easy to pull off.
The magic really happens when the smoke meets the sauce. We’re talking about a pork shoulder that’s been slow-smoked to perfection, getting all those delicious smoky notes deep into the meat. Then, we toss it with a good amount of buffalo sauce, maybe a touch of butter to smooth it out, and let it meld together. The result is a pulled pork that’s both comforting and exciting.
Here’s a general idea of how you might approach it:
- Prep the Pork: Start with a good pork shoulder (Boston butt works great). Give it a rub with your favorite spices – think paprika, garlic powder, onion powder, maybe a little cayenne for extra heat.
- Smoke it Low and Slow: Get your smoker going at a low temperature, around 225-250°F (107-121°C). Let the pork smoke for several hours until it reaches an internal temperature of about 165°F (74°C).
- Sauce it Up: Once it’s reached that temp, you can either wrap it to speed up the cooking and keep it moist, or continue smoking. Towards the end of the cooking process, or after you’ve pulled the pork, toss it generously with your favorite buffalo sauce. You can add a little melted butter to the sauce for that authentic Buffalo flavor.
- Rest and Shred: Let the pork rest after cooking, then shred it using two forks. Mix it well with the sauce.
This pulled pork is fantastic served on buns, piled high with coleslaw. It’s also great as a topping for nachos or loaded baked potatoes. It’s a flavor bomb that’s sure to be a hit at any gathering.
When you’re smoking the pork, don’t be afraid to experiment with different wood types. Hickory or a fruit wood like apple can add a nice complementary flavor to the buffalo sauce. The key is to get that tender, shreddable texture first, then layer on the bold buffalo flavor.
8. Pumpkin Spice Pulled Pork
Alright, let’s talk about a pulled pork recipe that’s a little outside the usual box, but trust me, it’s a winner, especially when the leaves start changing. This Pumpkin Spice Pulled Pork takes that classic slow-smoked tenderness and infuses it with the warm, cozy flavors of fall. We’re talking cinnamon, nutmeg, a hint of clove, all mingling with the rich pork. It sounds a bit wild, I know, but the sweetness and spice really complement the savory meat in a way that’s surprisingly delicious.
The key is balancing the spices so they don’t overpower the pork, but rather enhance its natural flavor. It’s perfect for a fall gathering or just when you’re craving something a little different.
Here’s a general idea of how you might approach it:
- Pork Cut: A pork shoulder (Boston butt) is still your best bet here. It has enough fat to stay moist during the long smoke.
- The Rub: This is where the magic happens. You’ll want a base of salt and pepper, then layer in your pumpkin pie spice blend. Think cinnamon, ginger, nutmeg, and a pinch of allspice or cloves. Some folks add a little brown sugar to help with bark formation.
- The Smoke: Low and slow is the way to go. Aim for around 225-250°F (107-121°C) for that classic pulled pork texture.
- The Finish: Once it’s fall-apart tender, shred it up. You can mix in a little of the cooking juices, or even a touch of apple cider or a mild BBQ sauce if you like, to keep it moist and tie the flavors together.
This recipe is a fantastic way to use up any leftover pumpkin pie spice you might have lying around after the holidays. It’s a unique twist that’s sure to get people talking, and more importantly, asking for seconds. Don’t be afraid to experiment with the spice blend to find your perfect fall flavor profile.
9. Pork Shoulder Burnt Ends
Alright, let’s talk about pork shoulder burnt ends. These aren’t your typical pulled pork. We’re talking about taking chunks of pork shoulder, smoking them low and slow until they’re tender, and then cubing them up and tossing them in sauce to get that crispy, caramelized, sticky goodness. It’s like the best part of the brisket, but with pork!
Making these is a bit of a process, but totally worth it. You start with a pork shoulder, cut it into cubes, season it up, and then smoke it for a good few hours. After that, you drain off some of the liquid, toss the cubes in your favorite BBQ sauce and maybe a little butter or brown sugar, and then put them back in the smoker or oven to get all sticky and delicious.
Here’s a general idea of how it goes down:
- Prep the Pork: Cut a pork shoulder (Boston butt works great) into roughly 1.5-inch cubes. Trim off any really hard fat, but leave some for flavor.
- Season Generously: Coat the cubes with your favorite BBQ rub. Don’t be shy here; you want that flavor to really stick.
- Smoke ‘Em Low and Slow: Get your smoker going around 225-250°F (107-121°C). Smoke the pork cubes for about 3-4 hours, or until they’re tender and have a nice bark forming.
- Sauce and Finish: Drain off most of the rendered fat and liquid from your pan. Toss the pork cubes with your preferred BBQ sauce, maybe a little brown sugar or honey, and a pat of butter. Put them back in the smoker (or oven) at a slightly higher temp, around 275°F (135°C), for another hour or so, stirring occasionally, until they’re sticky and caramelized.
The magic happens in that second phase. That’s where the sauce really thickens up and creates that irresistible burnt end texture. You want them tender enough to bite through easily, but with those crispy, chewy edges.
These are fantastic on their own as an appetizer, piled onto sliders, or even mixed into mac and cheese. Just be prepared, they go fast!
10. Smoked Kalua Pork
This Hawaiian classic is all about simplicity and incredible flavor. Smoked Kalua Pork uses just a few ingredients, but the low-and-slow smoking process transforms a humble pork shoulder into something truly special. The magic really happens with the smoky bark that forms on the outside, giving way to incredibly tender, juicy meat inside. It’s the kind of dish that makes you feel like a backyard BBQ pro without all the complicated steps.
What makes Kalua Pork so good is its minimal ingredient list, allowing the pork and smoke to shine. Traditionally, it’s cooked in an imu, an underground oven, but we can get pretty close using a smoker.
Here’s what you’ll need:
- A pork shoulder (Boston butt), about 5-8 pounds
- Hawaiian sea salt (or coarse sea salt)
- Liquid smoke (optional, but helps boost that imu flavor)
- Banana leaves (optional, for wrapping)
The process is pretty straightforward. You’ll want to rub the pork shoulder generously with the sea salt. If you’re using liquid smoke, you can add a little to the salt or brush it directly onto the pork. Some folks like to wrap the whole thing in banana leaves before smoking, which adds a subtle earthy flavor and helps keep the meat moist.
Then, it’s all about the smoke. You’ll want to smoke it at a low temperature, around 225-250°F, for a long time – think 8 to 12 hours, depending on the size of the shoulder. The goal is to get the internal temperature to around 200-205°F, where it will be super tender and easy to pull apart.
The beauty of Kalua Pork is its rustic nature. Don’t overthink it. The salt, the smoke, and the time are the real stars here. It’s a testament to how simple ingredients can create profound flavor when treated right.
Once it’s done, let it rest for a bit before shredding it with forks. Serve it up on some toasted rolls with a side of coleslaw, or just enjoy it piled high on a plate. It’s a crowd-pleaser that’s surprisingly easy to pull off.
11. Smoked Chile Verde
Looking for a pork recipe with a bit of a kick? Smoked Chile Verde might be just the thing. It takes the slow-cooked tenderness of smoked pork and pairs it with the bright, zesty flavors of green chiles and tomatillos. This isn’t your average pulled pork; it’s got a whole different personality.
The magic really happens when the pork absorbs the smoky flavor while it cooks low and slow. It becomes incredibly tender, making it perfect for shredding and mixing into that flavorful green sauce. It’s a dish that feels both comforting and exciting.
Here’s a general idea of how you might put it together:
- Prepare the Pork: Start with a pork shoulder or butt. Season it well with salt, pepper, and maybe some cumin or garlic powder. Get your smoker ready, aiming for a temperature around 225-250°F (107-121°C).
- Smoke the Pork: Let the pork shoulder smoke for several hours until it reaches an internal temperature of around 195-200°F (90-93°C). This low and slow cooking is key to getting that super tender texture.
- Make the Chile Verde Sauce: While the pork is smoking or resting, prepare your sauce. This usually involves sautéing onions and garlic, then adding roasted green chiles (like poblanos or anaheims), tomatillos, cilantro, and some broth. You can add a bit of spice with jalapeños or serranos if you like.
- Combine and Finish: Once the pork is smoked and rested, shred it. Then, mix the shredded pork into the chile verde sauce. You can let it simmer together for a bit to let the flavors meld. Some people like to finish it back on the smoker for a short time, or you can just serve it right away.
This dish is fantastic served in a bowl, maybe with some warm tortillas on the side. It’s a great way to use smoked pork in a way that’s a little unexpected but totally delicious.
12. Smoked Pork Steaks
Pork steaks are a real hidden gem when it comes to grilling and smoking. Cut from the pork shoulder, they’re naturally packed with flavor and have enough meat on them to really soak up whatever rub or sauce you throw their way. You can cook them hot and fast, or go low and slow – they’re pretty forgiving and turn out delicious either way.
These smoked pork steaks are the definition of comfort food. They’re big, they’re buttery, and they’re a fantastic way to get that deep, smoky flavor without a ton of fuss. The process usually involves a good smoke, then a braise, and finally a sear over some hot coals to get a nice caramelized crust.
Here’s a basic rundown of how you might approach them:
- Seasoning: Start with a good, all-purpose BBQ rub. Something with paprika, garlic powder, onion powder, salt, and pepper is usually a solid base.
- Smoking: Get your smoker going at a low temperature, around 225-250°F (107-121°C). Smoke the steaks until they develop a nice bark, usually a few hours.
- Braising: Transfer the smoked steaks to a pan, add a liquid like beef broth or apple cider, cover tightly, and continue cooking until they’re fork-tender.
- Finishing: Uncover the steaks, maybe baste them with some pan juices or your favorite BBQ sauce, and give them a quick sear over direct heat to get that final char.
They’re surprisingly easy to make and turn out so tender and flavorful. You might find yourself making these more often than you expect. They’re great served on a bun or just with some sides.
Don’t be afraid to experiment with different rubs and liquids for braising. You can really make these your own. They’re a great option when you want something impressive but don’t want to spend all day babysitting the grill.
13. BBQ Smoked Pork Belly
Alright, let’s talk about pork belly. Forget just bacon for a second, because this cut of meat is a total game-changer when it comes to BBQ. It’s rich, it’s fatty, and when you smoke it low and slow, it turns into something truly special. This recipe is all about getting that perfect balance of smoky flavor and melt-in-your-mouth tenderness.
Smoking pork belly isn’t complicated, but it does take a bit of patience. You’re looking for that deep, mahogany color and a texture that’s just begging to be pulled apart or sliced. It’s the kind of dish that makes people ask, "What is that?" and then immediately ask for seconds.
Here’s a general idea of how you might approach it:
- Prep the Belly: Start with a good slab of pork belly. You can score the fat cap if you like, but often just a good rub is all it needs. A simple mix of salt, pepper, garlic powder, and maybe a touch of paprika works wonders.
- Smoke it Low and Slow: Get your smoker going in the 225-250°F (107-121°C) range. Place the pork belly directly on the grates, fat side up if you’re feeling traditional. Let it smoke for several hours, until it reaches an internal temperature of around 195-205°F (90-96°C).
- The Wrap and Finish: Some folks like to wrap the belly in butcher paper or foil for the last couple of hours to help it push through the stall and get super tender. Others prefer to finish it unwrapped. You can also add a light glaze towards the end if you want a little sticky sweetness.
Pork belly’s high fat content is its superpower in the smoker. It renders down slowly, basting the meat from within and creating an incredibly moist and flavorful result. Don’t be afraid of the fat; it’s what makes this cut so decadent.
Once it’s done, you can serve it sliced like thick-cut bacon, cubed for appetizers, or even shredded for sandwiches. It’s versatile and always impressive. Seriously, give this one a shot; it’s a real crowd-pleaser.
14. Grilled Pork Chops with Homemade Sweet Rub
Alright, let’s talk pork chops. Sometimes, you just want something straightforward, right? These grilled pork chops with a homemade sweet rub are exactly that. They’re simple enough for a weeknight but have that special something that makes them perfect for when you’ve got people over.
The magic really happens with the rub. It’s a mix of sweet and savory that gets a beautiful crust on the chops when you hit them with direct heat. Then, you move them to indirect heat to finish cooking so they stay nice and juicy inside. Nobody likes a dry pork chop, and this method really helps avoid that.
Here’s a basic idea of what goes into a good sweet rub:
- Brown Sugar: For that caramelization and sweetness.
- Paprika: Adds color and a mild smoky flavor.
- Garlic Powder: A must for savory depth.
- Onion Powder: More savory goodness.
- Salt and Black Pepper: The foundation of any good seasoning.
- A pinch of Cayenne (optional): If you like a little kick.
When you’re grilling, remember the two-zone heat setup. Sear those chops over the hot side for a minute or two per side to get that nice color, then move them over to the cooler side to finish cooking gently. This way, you get the best of both worlds – a great sear and a perfectly cooked interior.
This method is all about building layers of flavor. The rub does its job on the outside, and the grilling process locks in the juices. It’s a classic for a reason, and once you try it, you’ll see why it’s a go-to for so many people.
Don’t forget to let them rest for a few minutes after they come off the grill. It makes a big difference in how juicy they end up. Seriously, it’s a small step that pays off big time.
15. Smoked Pork Chops
Alright, let’s talk about smoked pork chops. These aren’t your average, dry, forgettable chops. We’re aiming for juicy, tender, and packed with flavor here. Smoking pork chops low and slow is a game-changer, giving them a depth that grilling alone just can’t match.
The key is to get a good sear and then let the smoke work its magic. It’s a simple process, really, but it makes a huge difference in the final taste and texture. You end up with this amazing smoky aroma and a chop that practically melts in your mouth.
Here’s a basic rundown of how to get started:
- Choose your chops: Thick-cut, bone-in chops are usually best for smoking. They hold up better to the longer cooking time and stay juicier.
- Season them up: A good dry rub is your best friend here. Think savory spices with a touch of sweetness. Don’t be shy with the rub; it forms the flavorful crust.
- Smoke ’em low: Get your smoker going at a moderate temperature, around 225-250°F (107-121°C). This allows the smoke to penetrate the meat without drying it out.
- Finish strong: Once they’re close to done, you can crank up the heat a bit or even give them a quick sear on a hot grill to get a nice crust.
Remember, the goal is tender, juicy pork. Don’t overcook them! Using a meat thermometer is your secret weapon to hitting that perfect internal temperature every time.
It might sound a little involved, but honestly, once you get the hang of it, it’s pretty straightforward. And the payoff? Some seriously delicious pork chops that’ll have your guests asking for seconds.
16. Apple and Herb Brined Pork Chops
Brining pork chops might sound like a lot of extra work, but trust me, it makes a huge difference in the final result. This apple and herb brine is a game-changer for getting juicy, flavorful pork chops, especially if you tend to overcook them a bit. It’s a simple soak that really pays off.
The brine infuses the meat with moisture and a subtle sweetness from the apple, balanced by the savory notes of fresh herbs. It’s like giving your pork chops a spa treatment before they hit the grill.
Here’s what you’ll need for the brine:
- 4 cups apple cider
- 1/4 cup kosher salt
- 2 tablespoons brown sugar
- 1 sprig fresh rosemary
- 3 sprigs fresh thyme
- 2 bay leaves
To make the brine, just combine the apple cider, salt, and brown sugar in a saucepan. Heat it gently until the salt and sugar dissolve, then let it cool completely. Once cool, add the rosemary, thyme, and bay leaves. Submerge your pork chops in this mixture for about 2 to 4 hours in the refrigerator. After brining, pat them thoroughly dry before grilling. This step is super important for getting a good sear.
Brining is a technique that adds moisture and flavor to lean meats. The salt in the brine helps the pork absorb liquid, making it more tender and less likely to dry out during cooking. The apple and herbs add a delicate aroma and taste that complements the pork beautifully.
After brining and drying, you can season them with your favorite rub – a simple salt and pepper works great, or go for something a little more complex. Grill them over medium-high heat, flipping once, until they reach an internal temperature of 145°F (63°C). Let them rest for a few minutes before serving. You’ll be amazed at how tender and juicy they are!
17. Schwenkbraten (Grilled German Pork Chops)
Schwenkbraten, a German classic, translates to "swivel roast" and typically refers to marinated pork chops grilled over an open fire or on a grill. The key to this dish is the marinade, which tenderizes the pork and infuses it with a tangy, savory flavor. It’s a straightforward yet incredibly satisfying meal that’s perfect for a backyard cookout.
The marinade is where the magic happens for Schwenkbraten. It’s usually a simple mix of oil, vinegar, onions, and seasonings, allowing the pork to soak up all those good flavors for at least a few hours, or even overnight for the best results.
Here’s a breakdown of what you’ll typically need:
- Pork Chops: Thick-cut, bone-in or boneless pork chops work best. About 1-inch thick is ideal.
- Marinade Base: A combination of neutral oil (like vegetable or canola) and a sharp vinegar (like white wine or apple cider vinegar).
- Aromatics: Thinly sliced onions are a must for that classic German flavor.
- Seasonings: Salt, black pepper, and often a touch of caraway seed or marjoram.
Grilling these chops over direct heat gives them a beautiful char, while the marinade keeps them wonderfully moist. They cook relatively quickly, so keep an eye on them to avoid overcooking.
This dish is all about simple, honest flavors. Don’t overcomplicate it. The quality of the pork and the well-balanced marinade are what make Schwenkbraten shine. It’s a testament to how a few good ingredients, prepared with care, can create something truly memorable.
18. Stuffed Pork Chops
Stuffed pork chops are a fantastic way to take a simple cut of meat and turn it into something truly special for your guests. Think of it as a flavor party happening right inside the chop! You can get pretty creative with the stuffing, which is the best part.
Here are a few ideas for what to stuff them with:
- Savory Herb & Breadcrumb: A classic mix of breadcrumbs, herbs like sage and thyme, maybe some finely chopped onion and celery, all bound together with a little broth or melted butter. It’s comforting and familiar.
- Spinach & Cheese: Creamed spinach or sautéed spinach mixed with Parmesan, mozzarella, or even a creamy cheese like cream cheese or ricotta. This adds a rich, decadent layer.
- Mushroom & Gruyere: Sautéed mushrooms with garlic, shallots, and a good melting cheese like Gruyere or Swiss. This gives a deep, earthy flavor.
- Apple & Sausage: A sweeter, more autumnal stuffing with crumbled breakfast sausage, diced apples, onions, and a touch of cinnamon or sage.
The key to great stuffed pork chops is to not overstuff them, which can make them hard to cook evenly. You want just enough to create a delicious pocket of flavor.
When cooking, you’ll typically sear the chops first to get a nice crust, then finish them in the oven or on a cooler part of the grill to let the stuffing heat through and the pork cook to a safe internal temperature.
A good thick-cut pork chop, at least an inch or so, works best for stuffing. You’ll need to cut a pocket into the side of the chop, being careful not to cut all the way through. This pocket is where all the magic happens.
It might seem a little fancy, but honestly, it’s not that hard to do and the payoff is huge. Your guests will definitely be impressed.
19. Grilled Pork Loin Chops with Caramelized Apples and Onions
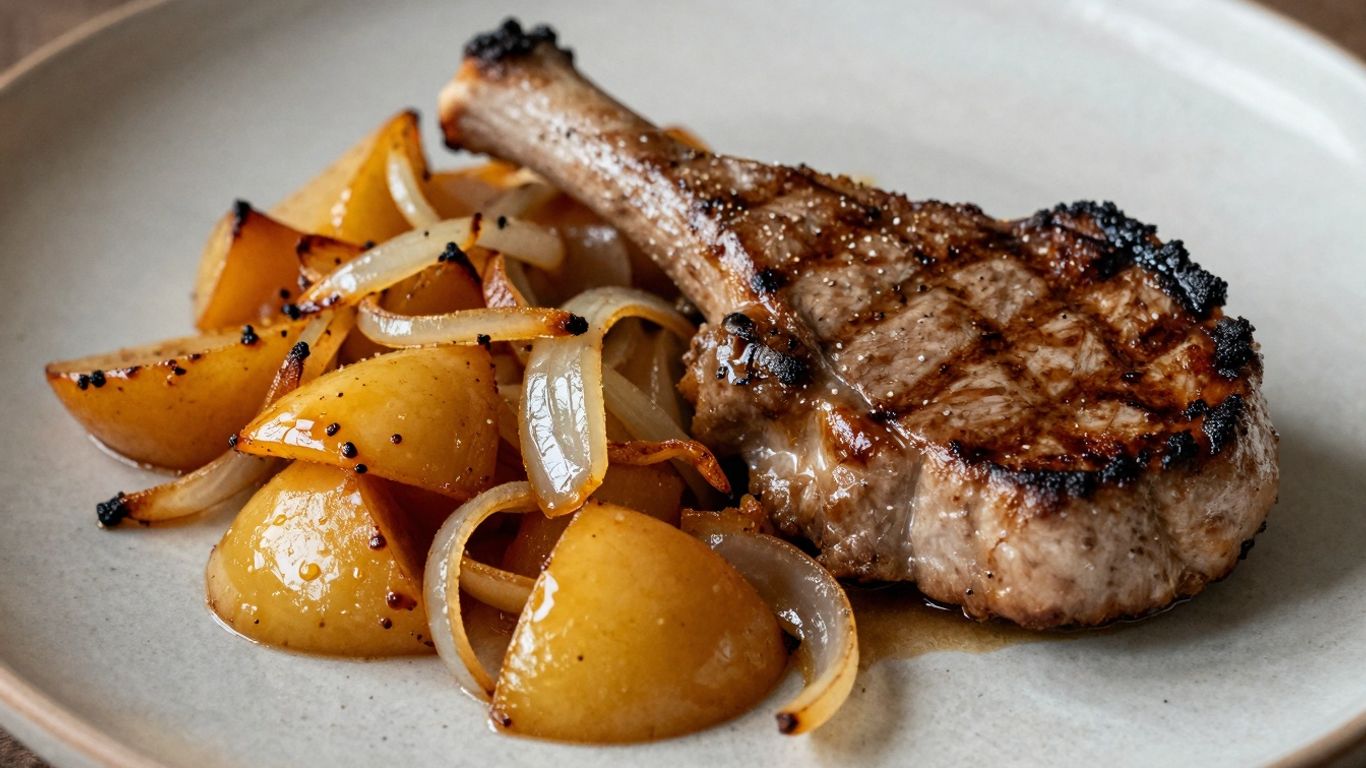
Alright, let’s talk about pork loin chops. These aren’t your average, run-of-the-mill chops. We’re talking about taking them to the next level with some sweet, savory caramelized apples and onions. It’s a combination that just works, folks.
Grilling pork loin chops can sometimes be tricky. They can dry out fast if you’re not careful. The trick here is to get a good sear on them over direct heat, then move them to indirect heat to finish cooking. This way, you get that nice crust without overcooking the inside. And those apples and onions? They get soft and sweet, almost like a built-in sauce.
Here’s a quick rundown of how to get this done:
- Prep the Pork: Start with good quality pork loin chops, about an inch thick. Give them a good rub down with your favorite savory seasoning. Think salt, pepper, garlic powder, maybe a little paprika.
- Caramelize the Fruit & Veg: While the grill heats up, get your apples and onions going in a pan. A little butter or oil, sliced apples (like Honeycrisp or Fuji), and some thinly sliced yellow onions. Cook them down until they’re soft and starting to brown.
- Grill the Chops: Sear the chops over direct heat for a few minutes per side until they have nice grill marks. Then, move them over to the cooler side of the grill to finish cooking until they reach an internal temperature of about 140-145°F.
- Rest and Serve: Let those chops rest for a few minutes before serving. Top them generously with the warm, caramelized apples and onions. It’s a simple dish, but it tastes like you spent hours in the kitchen.
This dish is perfect for a weeknight meal when you want something a little special without a lot of fuss. The sweetness of the apples and onions really complements the savory pork.
It’s a fantastic way to make pork chops feel a bit more elegant, don’t you think? Give it a try next time you fire up the grill.
20. The Best Pork Chop Seasoning
Alright, let’s talk about pork chop seasoning. You know, the kind that makes people ask for the recipe before they’ve even finished their first bite. It’s not rocket science, but getting it just right makes all the difference. A good rub is your secret weapon for juicy, flavorful pork chops.
Forget those bland, store-bought packets. Making your own seasoning blend is super simple and lets you control exactly what goes in. Plus, it’s way more satisfying.
Here’s a basic mix that works wonders:
- 1 tablespoon smoked paprika
- 1 tablespoon brown sugar
- 1 teaspoon garlic powder
- 1 teaspoon onion powder
- 1 teaspoon salt
- 1/2 teaspoon black pepper
- 1/2 teaspoon dried thyme
- 1/4 teaspoon cayenne pepper (optional, for a little kick)
Just mix it all up in a small bowl. You can even make a big batch and keep it in an airtight container for your next cookout. When you’re ready to season, pat your pork chops dry with a paper towel – this helps the rub stick better. Then, generously coat both sides of the chops. Don’t be shy!
This blend hits that sweet spot between savory, smoky, and a touch of heat. It creates a fantastic crust when seared and keeps the meat moist inside. It’s the kind of seasoning that makes even a simple weeknight meal feel special.
For thicker chops, you might want to let the seasoning sit on them for about 30 minutes before cooking. This gives the salt a chance to start breaking down the meat a little, making them even more tender. Then, grill or pan-sear them until they’re cooked through and have a nice, caramelized exterior. Easy peasy, and seriously delicious.
21. Grilled Honey Garlic Pork Tenderloin
This grilled honey garlic pork tenderloin is a real winner for a quick weeknight meal or a backyard get-together. It’s super tender, packed with flavor, and doesn’t take all day to cook. You’ll be amazed at how something so simple can taste so good.
The magic really happens with the glaze, which caramelizes beautifully on the grill.
Here’s a quick rundown of what you’ll need and how to get it done:
- Pork Tenderloin: About 1 to 1.5 pounds is usually good for a few people.
- Honey: The base of our sweet glaze.
- Garlic: Fresh minced garlic is best for that punchy flavor.
- Soy Sauce: Adds a salty, umami depth.
- Other Seasonings: A little ginger, maybe some red pepper flakes if you like a tiny bit of heat.
Steps to Deliciousness:
- Prep the Pork: Trim any silver skin off the tenderloin. You can give it a quick rub with salt and pepper, but honestly, the glaze does most of the heavy lifting here.
- Mix the Glaze: Whisk together honey, minced garlic, soy sauce, and any other seasonings you’re using in a small bowl.
- Grill Time: Get your grill to a medium-high heat. Sear the tenderloin for a few minutes on each side to get a nice crust. Then, move it to a cooler part of the grill (indirect heat) and start brushing on that honey garlic glaze. Keep brushing and flipping every few minutes until the pork is cooked through. This usually takes about 15-20 minutes total, depending on the thickness.
- Rest is Best: Once it’s done, take it off the grill and let it rest for about 5-10 minutes before slicing. This is super important for keeping the juices inside.
This recipe is fantastic because it’s so forgiving. Pork tenderloin cooks fast, so you just need to keep an eye on it. The honey garlic glaze is sticky and sweet, and it gets this amazing caramelized coating on the outside when it hits the hot grill. It’s one of those dishes that looks impressive but is actually pretty straightforward to pull off, even if you’re not a seasoned grill master.
Serve it sliced over rice, with some grilled veggies, or just on its own. It’s a guaranteed hit!
22. Simple Smoked Pulled Pork
Alright, let’s talk about pulled pork. This isn’t some fancy, complicated affair. We’re going for that classic, low-and-slow smoked pork shoulder that just falls apart. It’s the kind of dish that makes your house smell amazing for hours and rewards you with incredibly tender meat.
The beauty of this recipe is its simplicity. You don’t need a million ingredients or a degree in barbecue science. Just a good cut of pork, some basic seasonings, and patience. The result is a smoky, juicy pulled pork that’s perfect for sandwiches, tacos, or just eating straight from the pan.
Here’s a general idea of how it goes down:
- Prep the Pork: Start with a pork shoulder (also called a Boston butt). Give it a good rub with your favorite BBQ spices. Think paprika, brown sugar, garlic powder, onion powder, salt, and pepper. Don’t be shy with it!
- Smoke it Low and Slow: Get your smoker fired up to around 225-250°F. Place the seasoned pork shoulder directly on the grates. The general rule of thumb is about 90 minutes per pound, but this can vary. Using a meat thermometer is your best friend here to know when it’s done. You’re looking for an internal temperature of around 200-205°F.
- Rest and Shred: Once it hits that magic temperature and has a nice, dark bark, pull it off the smoker. Tent it loosely with foil and let it rest for at least an hour. This is super important for keeping the juices in. After resting, you can shred or pull the pork using two forks. Mix in some of the rendered juices from the pan for extra moisture and flavor.
This method focuses on letting the pork shine. The smoke does most of the heavy lifting, creating a deep flavor that’s hard to beat. It’s about building that delicious crust, or ‘bark,’ on the outside while keeping the inside moist and tender.
If you’re new to smoking pork or just want a reliable recipe that feeds a crowd, this is the one. It’s a foundational recipe that tastes amazing and is pretty forgiving. You can find more details on smoking times and temperatures for pork shoulder to help you nail it.
23. Twice Smoked Ham with Brown Sugar Honey Glaze
Taking a pre-cooked ham and giving it a second spin in the smoker is a fantastic way to add a ton of flavor without a ton of extra work. This method really lets the smoke penetrate the meat, making it incredibly juicy and delicious. The brown sugar and honey glaze is the perfect sweet and sticky counterpoint to the smoky ham.
This recipe is all about building layers of flavor. You start with a good quality ham, smoke it low and slow to infuse that smoky goodness, and then finish it with a simple glaze that caramelizes beautifully under a quick broil or a bit more time on the grill.
Here’s a basic rundown of how it works:
- Prep the Ham: Score the fat cap in a diamond pattern. This helps the smoke and glaze get into the meat.
- Smoke It: Get your smoker to around 225-250°F (107-121°C). Place the ham directly on the grates and let it smoke for about 1-2 hours, or until it reaches an internal temperature of about 140°F (60°C).
- Glaze It: While the ham is smoking, mix up your glaze. A simple combination of brown sugar, honey, and maybe a splash of apple cider vinegar works wonders.
- Glaze and Finish: Brush the glaze all over the ham. Return it to the smoker for another 30-60 minutes, or until the glaze is bubbly and caramelized, and the ham reaches an internal temperature of 145°F (63°C).
This twice-smoked approach transforms a standard holiday ham into something truly special. It’s a relatively hands-off process that yields incredibly tender and flavorful results, perfect for any gathering.
Serving this ham is pretty straightforward. Let it rest for about 15-20 minutes after it comes off the smoker before you slice into it. This allows the juices to redistribute, ensuring every slice is moist and delicious. It pairs wonderfully with classic sides like mashed potatoes, green bean casserole, or a fresh salad.
24. Smoked Spiral Ham with a Maple Bourbon Glaze
Alright, let’s talk about making a spiral-cut ham really sing. You’ve probably seen them at the grocery store, all pre-sliced and ready to go. They’re already pretty good, but a little time in the smoker with a killer glaze? That’s next level.
This recipe is all about infusing that smoky flavor and topping it off with a sweet and boozy glaze. The maple syrup brings a natural sweetness, while the bourbon adds a little something extra, a depth that you just can’t get from sugar alone. The combination is seriously addictive.
Here’s a basic rundown of how you’ll get this done:
- Prep the Ham: Take your spiral-cut ham out of the packaging. You’ll want to pat it dry really well. This helps the smoke and the glaze stick better.
- Smoke it Low and Slow: Get your smoker fired up to around 225-250°F (107-121°C). Place the ham directly on the grates, cut-side down if you can manage it, to help keep the slices moist.
- Make the Glaze: While the ham is smoking, whip up your glaze. It’s usually a mix of maple syrup, bourbon, maybe a little brown sugar, and some spices like cinnamon or nutmeg. Simmer it until it thickens up a bit.
- Glaze and Finish: Start brushing that glorious glaze all over the ham during the last hour or so of smoking. You’ll want to do this a few times to build up a nice, sticky coating. Some folks like to finish it under the broiler for a few minutes to get a really caramelized crust, but watch it closely so it doesn’t burn!
You’re aiming for an internal temperature of about 140°F (60°C) for a fully cooked ham. The smoking process is more about flavor and moisture than cooking it through, since most spiral hams are already cured and cooked.
It’s a pretty straightforward process, honestly. The hardest part is waiting for that amazing smell to fill your house. Serve it up with your favorite sides, and you’ve got a meal that’s sure to impress without you having to break a sweat.
25. Bourbon Peach Glazed Smoked Ham and more
Alright, let’s talk about ham. Specifically, a smoked ham with a bourbon peach glaze. This isn’t just any ham; it’s a flavor explosion that brings together the sweet, sticky goodness of peaches with the warm kick of bourbon, all wrapped up in that irresistible smoky flavor you get from a slow-smoked ham. It’s the kind of dish that makes people ask for seconds before they’ve even finished their first slice.
Making this glaze is pretty straightforward. You’ll simmer down some peach preserves, a good splash of bourbon, maybe a little maple syrup for extra depth, and a bit of orange zest to brighten it all up. Let it bubble away until it gets nice and thick. Then, you’ll brush it all over your smoked ham during the last hour or so of cooking. The heat caramelizes that glaze, creating a sticky, sweet, and slightly boozy crust that’s just out of this world.
Here’s a quick rundown of what you’ll need for the glaze:
- 1 cup peach preserves
- 1/4 cup bourbon
- 2 tablespoons maple syrup
- 1 teaspoon orange zest
This recipe is a fantastic way to use up any leftover smoked ham or to make a holiday meal extra special. It’s a bit of a showstopper, really. The combination of sweet fruit, smoky pork, and that bourbon warmth is just a winner every time. Plus, the aroma that fills your house while it’s cooking? Pure magic.
Don’t be afraid to experiment with the glaze. A little cinnamon or a pinch of cayenne can add another layer of complexity if you’re feeling adventurous. The key is to get that balance of sweet, smoky, and a hint of something extra.
Ready to Get Grilling?
So there you have it – a bunch of ways to make some seriously good pork BBQ. Whether you’re aiming for fall-off-the-bone ribs, juicy pulled pork sandwiches, or perfectly grilled chops, these recipes should get you started. Don’t be afraid to experiment with your favorite rubs and sauces. Now go ahead, fire up that grill or smoker, and get ready to wow your friends and family with some amazing pork. Happy cooking!
Frequently Asked Questions
What’s the best cut of pork for pulled pork?
The best cut for pulled pork is pork shoulder, also known as Boston butt. It has a good amount of fat, which makes it super tender and juicy when cooked low and slow.
How long does it take to smoke ribs using the 3-2-1 method?
The 3-2-1 method for ribs takes about 6 hours in total. It involves 3 hours of smoking, then 2 hours wrapped in foil, and finally 1 hour unwrapped to finish.
Can I make pulled pork without a smoker?
Yes, you can! You can achieve delicious pulled pork in an oven or a slow cooker. The key is to cook it at a low temperature for a long time until it’s fall-apart tender.
What’s a good way to tenderize pork chops before grilling?
A great way to tenderize pork chops is to use a slightly acidic liquid like apple juice or vinegar, or even mustard, as a base before applying your rub. This helps break down the meat fibers.
How do I get a good crust on my grilled pork chops?
To get a nice crust, start by searing your pork chops over direct, high heat for a few minutes on each side. Then, move them to indirect heat to finish cooking without burning the outside.
What makes pork belly so good for BBQ?
Pork belly is fantastic for BBQ because it’s rich and fatty. This fat renders down during cooking, making the meat incredibly tender, moist, and full of flavor.
Is it better to brine pork before smoking?
Brining pork, especially for chops or roasts, can add a lot of moisture and flavor. It helps the meat stay juicy, even if it’s cooked a little longer than planned.
What’s the difference between pork shoulder and pork butt?
Pork shoulder and pork butt are essentially the same cut of meat, often used interchangeably. Pork butt is the upper part of the shoulder, typically with more marbling, making it ideal for pulled pork.