
Hey everyone! So, you want to make some seriously good ribs, huh? The kind that makes your friends and family go wild? Well, you’ve come to the right spot. We’re going to walk through making ribs that are so tender they practically fall off the bone. It’s not as hard as you might think, and by the end of this, you’ll have some awesome bbq recipes for ribs to add to your collection. Let’s get cooking!
Key Takeaways
- Start with good quality ribs and prep them right by removing the membrane for better tenderness.
- A flavorful binder and a generous rub are your best friends for building that delicious outer crust.
- Low and slow smoking is the name of the game for truly tender ribs, so be patient!
- Wrapping the ribs partway through the cook helps lock in moisture and tenderize them further.
- Finishing with a glaze and letting the ribs rest before slicing makes all the difference.
Selecting and Preparing Your Ribs
Alright, let’s talk ribs. Before we even think about smoke or sauce, we need to start with the right foundation. Picking good ribs and getting them ready is half the battle, and it’s where we begin our journey to fall-off-the-bone perfection. This is where we learn how to tenderize ribs before they even hit the heat.
Choosing the Right Rib Cut
Not all ribs are created equal, and knowing what to look for makes a big difference. For that classic BBQ experience, you’ll usually be choosing between St. Louis style and Baby Back ribs. St. Louis ribs are spareribs that have been trimmed down, giving you a more uniform rack with a good amount of meat and fat. They tend to be a bit more forgiving on the smoker. Baby Backs are from higher up on the hog, closer to the spine. They’re leaner and tend to cook a bit faster, but can dry out more easily if you’re not careful. For beginners, St. Louis style ribs are often a great starting point.
Essential Preparation Steps
Once you’ve got your ribs, a little prep goes a long way. First, give them a quick rinse under cold water and then pat them completely dry with paper towels. This helps your rub stick better. Next, take a look at the rack. You want to trim off any really thick, hard pieces of fat that might not render down well or could get a bit greasy. Also, look for any thin, raggedy bits of meat hanging off the edges – trim those up for a cleaner presentation and to prevent them from burning.
Removing the Membrane for Tenderness
This is a step a lot of people skip, but it’s a game-changer for tender ribs. On the bone side of the ribs, there’s a tough, papery membrane. If you leave it on, it can prevent smoke and rub from getting into the meat, and it just doesn’t feel great when you bite into it. To remove it, slide a butter knife under the membrane at one end, just enough to get a little lift. Then, grab that lifted edge with a paper towel (it’s slippery!) and pull it off in one piece. It should peel away pretty easily. If it tears, just grab another edge and keep going. Getting this membrane off is key to achieving that truly tender, melt-in-your-mouth texture.
Proper preparation isn’t just about making things look good; it’s about setting yourself up for success. Taking a few extra minutes to clean, trim, and remove the membrane means your ribs will absorb flavor better and cook more evenly, leading to a much more enjoyable eating experience.
Crafting the Perfect Rib Rub
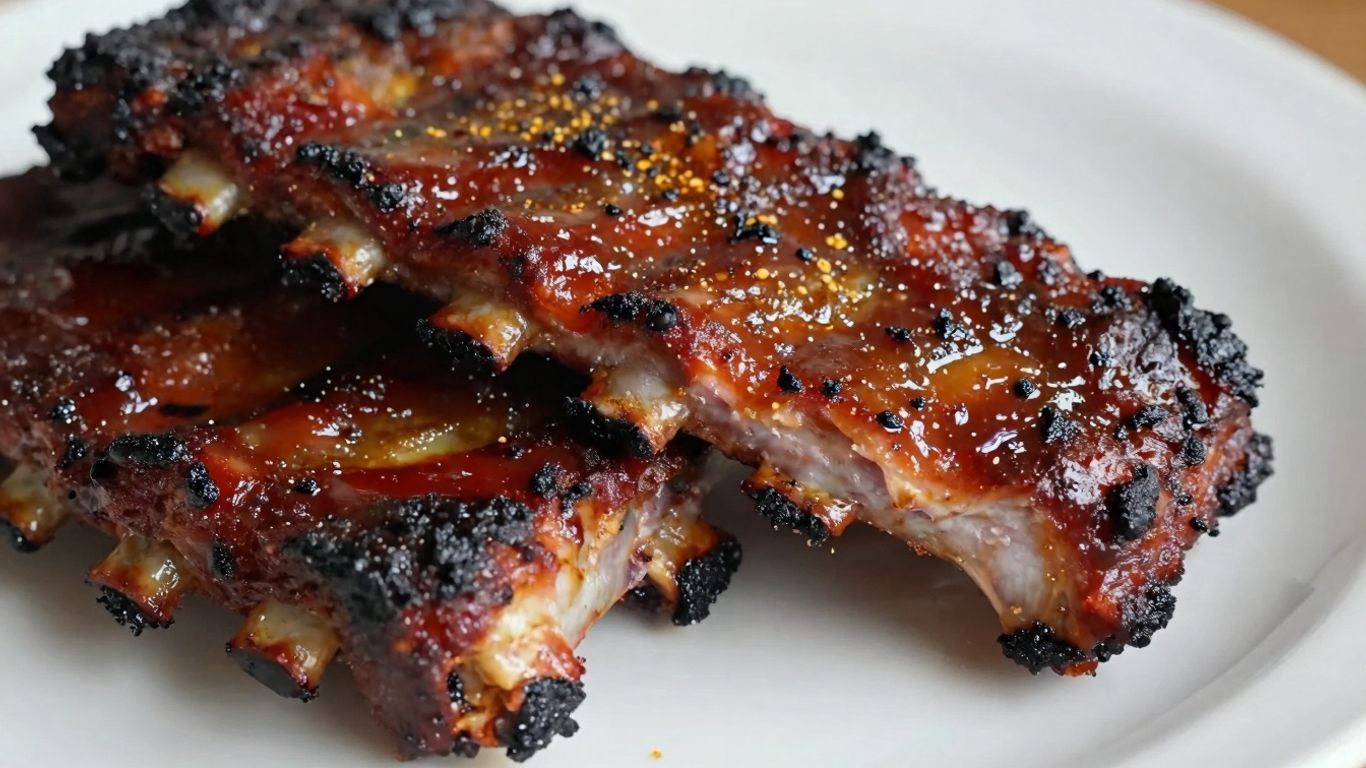
Alright, let’s talk about the flavor foundation for our ribs: the rub. This is where you really get to make these ribs your own. A good rub does more than just add taste; it helps build that amazing crust, often called the bark, that we all love.
Applying a Flavorful Binder
Before we dump on the dry spices, we need something to help them stick. Think of it like glue for your rub. I usually go with yellow mustard. Don’t freak out – you won’t taste the mustard after it cooks. It just provides a slightly sticky surface for the rub to cling to. Just spread a thin, even layer all over the ribs, both sides. If mustard isn’t your thing, a little W sauce works just as well, or even a thin layer of olive oil.
Generously Coating with Your Favorite Rub
Now for the fun part! It’s time to apply your chosen rub. Don’t be shy here. You want a good, thick coating all over the ribs. Pat it down gently so it adheres well. This is where you can get creative. You can use a store-bought blend, or whip up your own. A basic mix often includes paprika, brown sugar, salt, garlic powder, onion powder, and a little black pepper. Some people like a little heat, so a pinch of cayenne or chili powder can be a nice addition. The goal is to cover every nook and cranny for maximum flavor.
Here’s a simple, crowd-pleasing rub recipe to get you started:
- 1/4 cup paprika
- 2 tablespoons brown sugar
- 1 tablespoon salt
- 1 tablespoon garlic powder
- 1 tablespoon onion powder
- 1 teaspoon black pepper
- 1/2 teaspoon cayenne pepper (optional)
Mix all these ingredients together in a bowl. Once your binder is applied, sprinkle this mixture generously over the ribs, patting it in to create a nice, even layer. This rub is a great starting point, and you can find many other BBQ spice rub options online to experiment with as you get more comfortable.
Remember, the rub isn’t just about taste; it’s about building that beautiful, flavorful crust on the outside of your ribs. A good binder and a generous application are key to achieving that perfect bark.
The Art of Smoking Ribs
Setting Up Your Smoker or Grill
Alright, time to get that smoker or grill ready. We’re aiming for a steady, low temperature, which is key for tender ribs. Most folks find that a range between 250°F and 275°F works best. If you’re using a pellet grill, just set it to your desired temperature. For charcoal smokers or kettle grills, you’ll want to set up for indirect heat. This means getting your coals going and arranging them on one side of the grill, leaving the other side empty for the ribs to cook with radiant heat, not direct flame. This indirect heat setup is what prevents your ribs from burning while still letting that smoke work its magic.
Achieving Low and Slow Perfection
Low and slow is the name of the game here. We’re talking about cooking the ribs for several hours at that consistent low temperature. This gentle cooking process breaks down the tough connective tissues in the ribs, turning them into gelatin. That’s what gives you that melt-in-your-mouth texture. Rushing this part is a common mistake, leading to tough, chewy ribs. Patience is definitely a virtue when it comes to smoking ribs.
Strategic Rib Placement for Even Cooking
Where you put the ribs on the grill matters. Generally, you want to place them bone-side down, away from the direct heat source. If you’re cooking multiple racks, try to arrange them so they aren’t touching too much. This allows the smoke and heat to circulate evenly around each rack. Some pitmasters like to rotate the ribs halfway through the cooking process, or even move racks from one side of the grill to the other, to make sure everything cooks uniformly. It’s all about giving every part of the ribs equal attention.
Don’t be afraid to experiment with your grill’s hot spots. Understanding where your grill runs hotter or cooler will help you make adjustments throughout the cook, ensuring a more even result for all your racks.
Maintaining Moisture During the Cook
Keeping your ribs from drying out during that long, slow cook is pretty important if you want them to be tender and juicy. It’s all about managing the moisture. Think of it like giving them a little spa treatment while they’re on the heat.
Creating Your Signature Spritz
This is where you can get a little creative. A spritz is basically a liquid you’ll spray onto the ribs periodically. It helps keep the surface moist, which in turn helps the rub form a nice crust, often called ‘bark’. You can go simple or get fancy. A basic mix is just apple juice or apple cider vinegar, or even a 50/50 blend of the two. Some folks like to add a splash of water to dilute it a bit. If you’re feeling adventurous, you could try things like a light beer, a bit of beef broth, or even a mix of Worcestershire sauce and water. Just remember, you’re not trying to boil them, just give them a light misting.
The Importance of Regular Spritzing
So, why spritz? Well, as the ribs cook, especially at lower temperatures for a long time, the moisture on the surface can evaporate. Spritzing replenishes that moisture. It also helps to keep the rub from drying out and cracking too much. A good rule of thumb is to start spritzing about an hour into the cook, and then every 45 minutes to an hour after that. Don’t go crazy with it, though. You don’t want to blast the rub right off the ribs. Just a light, even spray is all you need. This process helps build up those layers of flavor and keeps the meat from getting tough.
Rotating Ribs for Uniformity
Ribs rarely cook perfectly evenly, especially if you’re using a grill or smoker with hot spots. That’s where rotation comes in. About halfway through your cooking time, it’s a good idea to give those ribs a turn. If you have multiple racks, swap their positions. Move the ribs from the hotter side of the grill to the cooler side, and vice versa. Also, consider flipping the racks if one side seems to be cooking faster than the other. This simple step helps make sure every rack, and every part of every rack, gets cooked just right, preventing any one section from drying out while another is still underdone.
The Crucial Wrapping Stage
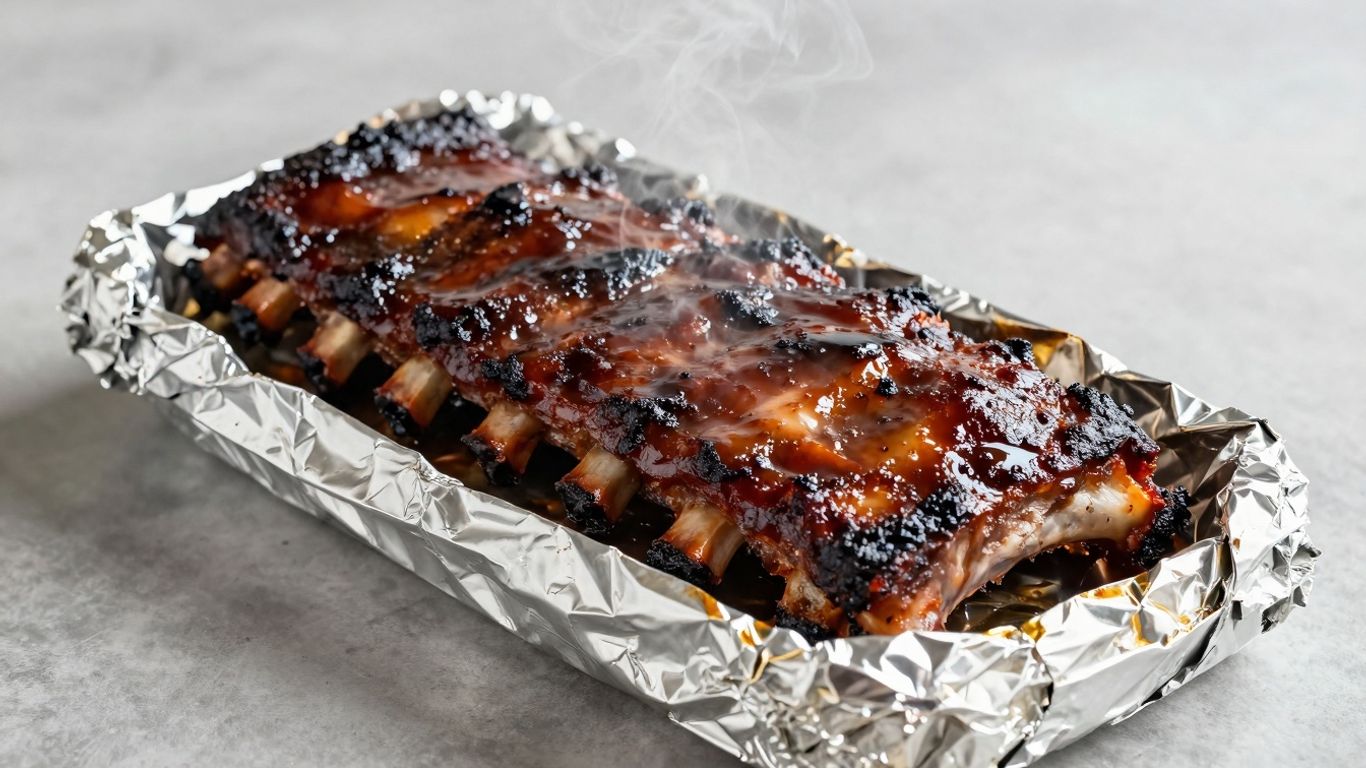
Alright, so your ribs have been hanging out on the smoker for a few hours, building up that beautiful color and smoky flavor. Now it’s time for a little spa treatment to get them super tender. This stage is where we really push them towards that fall-off-the-bone texture.
Assessing Rib Color and Texture
Before we wrap, take a peek at your ribs. They should have a deep, rich color, kind of mahogany-like, from the rub and the smoke. The surface should feel a little tacky, not wet, and the meat might be starting to pull back slightly from the ends of the bones. This is your cue that they’re ready for the next step. If they look a bit dry, don’t worry, the wrapping process will fix that right up.
Adding Sweetness with Butter and Brown Sugar
This is where we add a little something extra to help tenderize and add a touch of sweetness. You’ll need some butter and brown sugar. Some folks use honey or even a splash of apple juice here, but butter and brown sugar are a classic combo for a reason.
Here’s what you’ll need for wrapping:
- Aluminum foil (heavy-duty works best)
- Butter (about 1-2 tablespoons per rack)
- Brown sugar (about 1/4 cup per rack)
Lay out a large sheet of foil, big enough to completely enclose your rack of ribs. Place the ribs on top, bone-side down. Then, dot the top of the ribs with your butter and sprinkle generously with brown sugar. The butter will melt and baste the meat, while the sugar helps create a sticky, sweet glaze.
Sealing the Ribs for Maximum Tenderness
Once you’ve got the butter and sugar on there, it’s time to wrap them up tight. Fold the foil over the ribs, creating a sealed packet. You want to trap all that steam and moisture inside. This is often called the "Texas Crutch" in the BBQ world. It helps push the ribs through the stall – that point where the temperature seems to stop rising – and makes them incredibly tender.
This wrapping step is like giving your ribs a little steam bath. It softens the connective tissues and makes the meat incredibly succulent. Don’t skip it if you’re aiming for that melt-in-your-mouth texture.
After wrapping, put the ribs back on the smoker or grill for another hour to hour and a half. They’ll finish cooking in their own juices, getting super tender and ready for the final glaze.
Finishing Touches for Glazed Ribs
Unwrapping and Applying the Glaze
After all that low and slow cooking, it’s time to give your ribs that sticky, sweet finish. You’ll know they’re ready for this stage when they have a deep, rich color from the rub and feel tender. Carefully unwrap the foil – watch out for steam! Place the ribs back on the grill, meat-side up. Now, grab your favorite BBQ sauce and brush a generous layer all over the top of the ribs. This is where the magic really happens, turning them into those beautiful, glazed ribs everyone loves. This step is key for that perfect fall apart ribs oven baked texture.
Caramelizing the Sauce to Perfection
This is where you get that irresistible, slightly crispy edge on the sauce. With the glaze applied, put the ribs back on the grill, but this time, you want to get a little closer to the heat. If you’re using a grill, this might mean moving them to a slightly hotter zone or even briefly over direct heat for a minute or two per side. For an oven, you can use the broiler. Keep a very close eye on them during this stage; the sugars in the sauce can burn quickly. You’re looking for the sauce to bubble and thicken, creating a beautiful, caramelized coating.
A Final Spritz for Shine
Just before you pull them off, give the ribs one last light spritz. This isn’t about adding more flavor at this point, but about giving them that glossy, just-finished look. A quick mist of apple juice or even just water can make a big difference in presentation. It makes them look moist and ready to eat, adding that final polish to your masterpiece.
Serving Your Masterpiece
Alright, you’ve put in the work, and those ribs look absolutely incredible. Now comes the moment of truth: getting them from the smoker to the plate in a way that does them justice. Don’t rush this part; it’s just as important as the cooking itself.
Allowing Ribs to Rest
This is probably the most overlooked step, but it’s super important. After all that time on the smoker, the juices inside the ribs need a chance to redistribute. If you cut into them right away, all those delicious juices will just run out onto your cutting board, leaving you with drier meat. Tent them loosely with foil and let them sit for about 15-30 minutes. This short break makes a big difference in the final tenderness and moisture.
Slicing and Presenting Your Ribs
Once they’ve had their rest, it’s time to slice. The best way to tell if they’re ready is to pick up a rack and see if the meat easily pulls away from the bone. You want to slice between the bones. A sharp knife is your best friend here. For presentation, you can arrange them in a "bone-on" rack, or if you’re feeling fancy, you can separate them into individual ribs. Don’t forget to have some of your favorite barbecue side dishes ready to go alongside them. It’s all about making that plate look as good as it tastes.
Here’s a quick rundown for slicing:
- Use a long, sharp knife.
- Slice between the bones, following the natural meat separation.
- Aim for about 1-inch thick pieces for a good bite.
- Wipe your knife clean between cuts if needed to keep slices neat.
Remember, the goal is to showcase the beautiful bark and tender meat you’ve worked so hard to achieve. A little care in presentation goes a long way in making your ribs a true showstopper.
Tips for BBQ Ribs Success
Getting ribs just right can feel like a puzzle sometimes, but a few simple tricks can make a big difference. It’s all about paying attention to the details.
Ensuring Uniform Cooking
To get ribs that are all perfectly tender, try to make sure they’re roughly the same size and shape before they hit the grill. This helps them cook evenly. If you’re using multiple racks, arrange them so they aren’t overlapping too much. Sometimes, just rotating them halfway through the cook can help too. Move the racks around on the grill so the ones on the edges get some time in the middle, and vice versa. This is a simple step that really helps avoid any dry spots or undercooked sections.
Exploring Binder and Spritz Alternatives
While mustard and apple juice are popular choices, don’t be afraid to experiment. For a binder, try a thin layer of W sauce, pickle juice, or even a mix of mustard and pickle juice for a tangy kick. When it comes to spritzing, apple cider vinegar mixed with water can add a nice bite, or even a splash of your favorite soda like Dr. Pepper can add a subtle sweetness. The best way to cook ribs on the grill often comes down to finding what flavors you like best.
Monitoring Grill Temperature
Keeping your grill temperature steady is key for that low and slow cook. Aim for around 250°F to 275°F. If your grill temperature swings too much, it can mess with the cooking time and the texture of the ribs. A reliable grill thermometer is your best friend here. For those using pellet grills, many have built-in temperature controls that make this part much easier. Consistent heat means consistent results, which is what we’re after for these slow cooked pork ribs recipes.
Don’t get too caught up in exact timings. Ribs are done when they’re done. Use the bend test or a probe thermometer to check for tenderness. The color from a good smoky ribs dry rub marinade is a good indicator, but tenderness is the real goal.
Here are some common binder and spritz options:
- Binders:
- Yellow Mustard
- W Sauce
- Pickle Juice
- Hot Sauce
- Spritzes:
- Apple Juice
- Apple Cider Vinegar
- Water
- Dr. Pepper
- Beef Broth
These little adjustments can really make your bbq recipes for ribs stand out.
Creative Rib Variations
So, you’ve mastered the basics, huh? That’s awesome. But what if you’re feeling a little adventurous? Ribs are surprisingly versatile, and you can really play around with different flavors and styles. It’s not just about pork ribs anymore, either. Ever thought about beef short ribs? They’re fantastic for slow cooking and have a richer flavor. You can find some really delicious short rib recipes online if you want to explore that route.
Exploring Different Rib Styles
Ribs come in all shapes and sizes, and each has its own charm. You’ve got your classic baby backs, which are smaller and cook up quicker. Then there are spare ribs, which are larger and have more fat, making them super flavorful when cooked low and slow. St. Louis-style ribs are actually spare ribs trimmed down to a more uniform shape, which makes for easier cooking and presentation. And don’t forget country-style ribs – these are actually cut from the loin and are more like a thick pork chop, but they cook up like ribs and are super forgiving.
Here’s a quick rundown:
- Baby Back Ribs: Leaner, shorter, cook faster. Great for beginners.
- Spare Ribs: Larger, fattier, more intense flavor. Need more time.
- St. Louis Style: Trimmed spare ribs. Uniform and meaty.
- Country-Style Ribs: Not technically ribs, but cook like them. Very forgiving.
Experimenting with Unique Flavor Profiles
This is where things get really fun. Forget the standard rub for a minute. What about a spicy Korean-inspired gochujang glaze? Or maybe a sweet and tangy Jamaican jerk rub? You can even go for a smoky chipotle-lime combination. The binder you use can also add a twist – think Worcestershire sauce, pickle juice, or even a bit of Dijon mustard. And for your spritz, why not try something different like pineapple juice or a mix of beer and hot sauce?
Don’t be afraid to mix and match. A binder that’s a little tangy can balance out a sweet rub, and a spritz that’s herbaceous can cut through the richness of a fatty rib. It’s all about creating a flavor profile that makes your taste buds sing.
Think about different cuisines too. You could do a Thai-inspired rib with peanut sauce and cilantro, or a Mediterranean-style rib with herbs and lemon. The possibilities are pretty much endless, and that’s the beauty of BBQ. It’s a canvas for your creativity. So go ahead, get a little wild with it!
Enjoy Your Masterpiece!
So there you have it – a whole lot of steps, sure, but totally worth it. You’ve just made some seriously amazing ribs that are going to impress everyone. Whether you’re serving them up at a big family get-together or just treating yourself, these fall-off-the-bone beauties are a guaranteed win. Don’t be surprised if people start asking for your secret recipe. Now go on, grab a plate, and enjoy the fruits of your labor. You earned it!
Frequently Asked Questions
What kind of ribs should I use?
You can use St. Louis style ribs or baby back ribs. St. Louis style ribs are a bit larger and have more meat, while baby back ribs are smaller and leaner. Both can turn out super delicious with this method!
Why do I need to remove the membrane from the ribs?
That thin, papery layer on the bone side of the ribs is called the membrane. If you leave it on, it can make the ribs tough and chewy. Peeling it off lets the seasonings get into the meat better and makes the ribs way more tender.
What’s the best way to apply the rub?
First, put on a thin layer of something sticky, like mustard or even hot sauce. This is called a binder, and it helps the rub stick really well. Then, sprinkle your favorite BBQ rub all over the ribs, making sure to cover every spot. Pat it down gently so it doesn’t fall off.
How long should I smoke the ribs?
Smoking ribs takes time! Generally, you’ll want to smoke them at a low temperature, around 250-275°F, for about 3 to 4 hours. The exact time can change depending on the thickness of your ribs and your smoker.
What is ‘spritzing’ and why do I do it?
Spritzing means spraying a liquid, like apple juice, vinegar, or even Dr. Pepper, onto the ribs every so often while they’re cooking. It helps keep the meat moist and adds extra flavor. It also helps build up that delicious crusty outside, called ‘bark’.
When should I wrap the ribs in foil?
You usually wrap the ribs after they’ve been smoking for a few hours and have developed a nice color. Wrapping them in foil with some butter and brown sugar helps them become super tender and locks in moisture.
How do I know when the ribs are done?
The best way to tell is by feel. The meat should be tender and should pull away easily from the bone when you gently bend the rack. You can also poke a piece of meat with a fork; it should go in with very little resistance. Ribs that ‘fall off the bone’ are actually often overcooked!
Can I make these ribs in the oven instead of smoking them?
Yes, you absolutely can! Baking them low and slow in the oven, usually around 275°F, for a few hours, then finishing them with sauce, can also give you incredibly tender and delicious ribs. It’s a great alternative if you don’t have a smoker.